Difference between revisions of "Sentry SSO with JIRA"
| (19 intermediate revisions by the same user not shown) | |||
| Line 17: | Line 17: | ||
To configure SSO on JIRA a third party add-on is required. There are many SAML plugins available but the plugin that has been used by one of our partners and integrated successfully is the "SAML 2.0 Single Sign-On for JIRA" plugin by Bitium, Inc. | To configure SSO on JIRA a third party add-on is required. There are many SAML plugins available but the plugin that has been used by one of our partners and integrated successfully is the "SAML 2.0 Single Sign-On for JIRA" plugin by Bitium, Inc. | ||
| − | + | Goto the AddOns configuration page in JIRA. Search for Bitium and install the "SAML 2.0 Single Sign-On for JIRA" addon: | |
| − | + | [[File:JIRA SAML Bitium plugin.JPG]] | |
| + | [[File:JIRA SAML Bitium plugin install.JPG]] | ||
| + | [[File:JIRA SAML Bitium plugin installed.JPG]] | ||
| − | + | Once installed, goto the System settings screen in JIRA, to begin the SAML configuration: | |
| − | [[File: | + | |
| − | + | [[File:JIRA SAML Bitium plugin settings system.JPG]] | |
| + | |||
| + | The plugin configuration screen is located on the left hand menu under Security: | ||
| + | |||
| + | [[File:JIRA SAML Bitium plugin settings system security SAML config.JPG]] | ||
| − | |||
| + | [[File:JIRA SAML Bitium plugin settings system security SAML.JPG]] | ||
| − | + | Configure the settings as shown in the screenshot, being careful to replace your hostname in the highlighted areas. Leave NameID as it is. | |
| − | + | In the X.509 Certificate field, you will need to paste the Key from Swivel AuthControl Sentry. Navigate to your AuthControl Sentry Keys page and copy the certificate text into the SAML plugin in JIRA. | |
| − | + | [[File:Open cert in text editor.jpg]] | |
| + | [[File:Copy cert text for paste into JIRA plugin.png]] | ||
| − | + | Once all the settings have been configured in the JIRA SAML plugin, save and apply the changes. | |
| + | |||
== Setup AuthControl Sentry Application definition == | == Setup AuthControl Sentry Application definition == | ||
| − | + | First we should upload the JIRA logo. Find it using a Google Images search or copy it from here: | |
| + | [[File:Jira logo.png]] | ||
| − | + | Login to the AuthControl Sentry Administration Console. Click Application Images in the left hand menu. Click the Upload Image button on the top right. | |
| + | [[File:Upload new image.JPG]] | ||
| − | Name: JIRA | + | Browse to the Logo file you have saved: |
| + | |||
| + | [[File:Upload new image browse.JPG]] | ||
| + | |||
| + | Then upload the image to the Sentry application: | ||
| + | |||
| + | [[File:Upload new image uploaded.jpg]] | ||
| + | |||
| + | The image should now be available to select, when we go to create a new Application definition for JIRA: | ||
| + | |||
| + | [[File:Upload new image list.JPG]] | ||
| + | |||
| + | |||
| + | Login to the AuthControl Sentry Administration Console. Click Applications in the left hand menu. To add a new Application definition for JIRA, click the Add Application button and select SAML - Other type. | ||
| + | |||
| + | |||
| + | [[File:Application SAML Other.jpg|1000px]] | ||
| + | |||
| + | |||
| + | |||
| + | |||
| + | Name: '''JIRA''' | ||
Points: 100 (the number of points the user needs to score from their Authentication Method in order to successfully authenticate to this Application) | Points: 100 (the number of points the user needs to score from their Authentication Method in order to successfully authenticate to this Application) | ||
| − | Portal URL: URL to access to JIRA | + | Portal URL: URL to access to JIRA e.g. http://'''JIRA_HOSTNAME:8080'''/plugins/servlet/saml/auth |
| − | Entity ID: Identifier of the JIRA SAML request | + | Endpoint URL: Leave blank - not required |
| + | |||
| + | Entity ID: Identifier of the JIRA SAML request e.g. http://'''JIRA_HOSTNAME:8080'''/jiraSAML | ||
Federated Id: email | Federated Id: email | ||
| + | |||
| + | |||
| + | [[File:JIRA SAML Application definition.jpg]] | ||
| Line 66: | Line 102: | ||
Login to the AuthControl Sentry Administration Console. Click Authentication Methods in the left hand menu. Click the Edit button against the Turing option in the list of Authentication Methods. Give this Authentication Method 100 points. This will mean that when a login attempt is made to the JIRA Application, this Authentication Method will be offered during login. (Please read about AuthControl Sentry Rules and familiarize your self with AuthControl Sentry [[SentryUserGuide|here ]]) | Login to the AuthControl Sentry Administration Console. Click Authentication Methods in the left hand menu. Click the Edit button against the Turing option in the list of Authentication Methods. Give this Authentication Method 100 points. This will mean that when a login attempt is made to the JIRA Application, this Authentication Method will be offered during login. (Please read about AuthControl Sentry Rules and familiarize your self with AuthControl Sentry [[SentryUserGuide|here ]]) | ||
| − | + | == Testing authentication to JIRA via Swivel AuthControl Sentry == | |
| − | == Testing authentication to | ||
This should be the final step after all previous elements have been configured. | This should be the final step after all previous elements have been configured. | ||
| Line 74: | Line 109: | ||
| − | [[File: | + | [[File:JIRA SAML Application portal.jpg|1000px]] |
| Line 80: | Line 115: | ||
| − | |||
| − | |||
| − | |||
| − | |||
| − | |||
Once you have submitted your username. You should be presented with the Sentry username page. | Once you have submitted your username. You should be presented with the Sentry username page. | ||
| Line 91: | Line 121: | ||
| − | [[File:JIRAUsername. | + | [[File:JIRAUsername.jpg|500px]] |
| Line 97: | Line 127: | ||
| − | [[File:JIRATuring. | + | [[File:JIRATuring.jpg|500px]] |
After we enter our authentication credentials we successfully will see the JIRA account that we tried to access. | After we enter our authentication credentials we successfully will see the JIRA account that we tried to access. | ||
| − | |||
| − | |||
== Troubleshooting == | == Troubleshooting == | ||
Latest revision as of 10:48, 18 August 2017
Contents
Introduction
This document describes how to configure on-premise Atlassian JIRA to work with Sentry SSO. Before following these instructions, you should be familiar with using Sentry - see the Sentry User Guide for more information.
Setup AuthControl Sentry Keys
Before you are able to create a Single Sign On configuration on your JIRA site, you will need to setup some Keys. Please see a separate article: HowToCreateKeysOnCmi. You will need the certificate you generate in a later section of this article. This can be retrieved from the View Keys menu option of Swivel AuthControl Sentry.
Setup SSO on JIRA
To configure SSO on JIRA a third party add-on is required. There are many SAML plugins available but the plugin that has been used by one of our partners and integrated successfully is the "SAML 2.0 Single Sign-On for JIRA" plugin by Bitium, Inc.
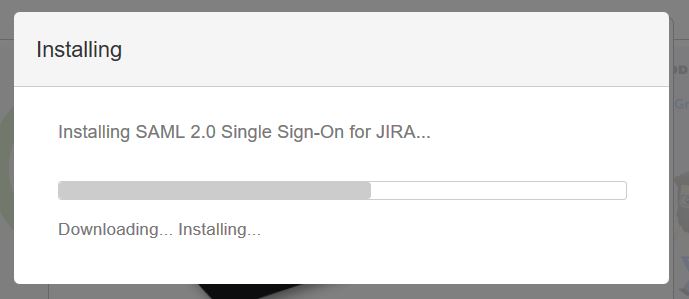
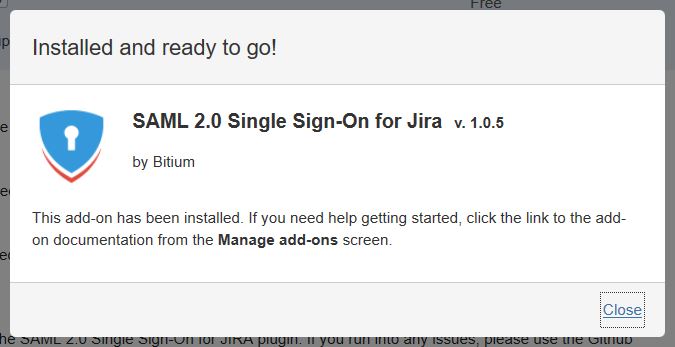
Goto the AddOns configuration page in JIRA. Search for Bitium and install the "SAML 2.0 Single Sign-On for JIRA" addon:
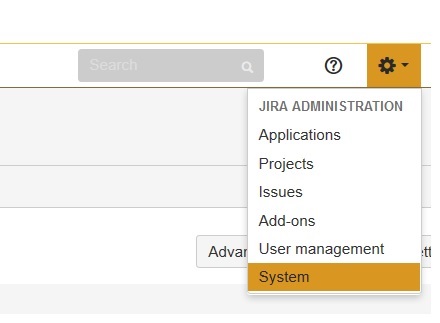
Once installed, goto the System settings screen in JIRA, to begin the SAML configuration:
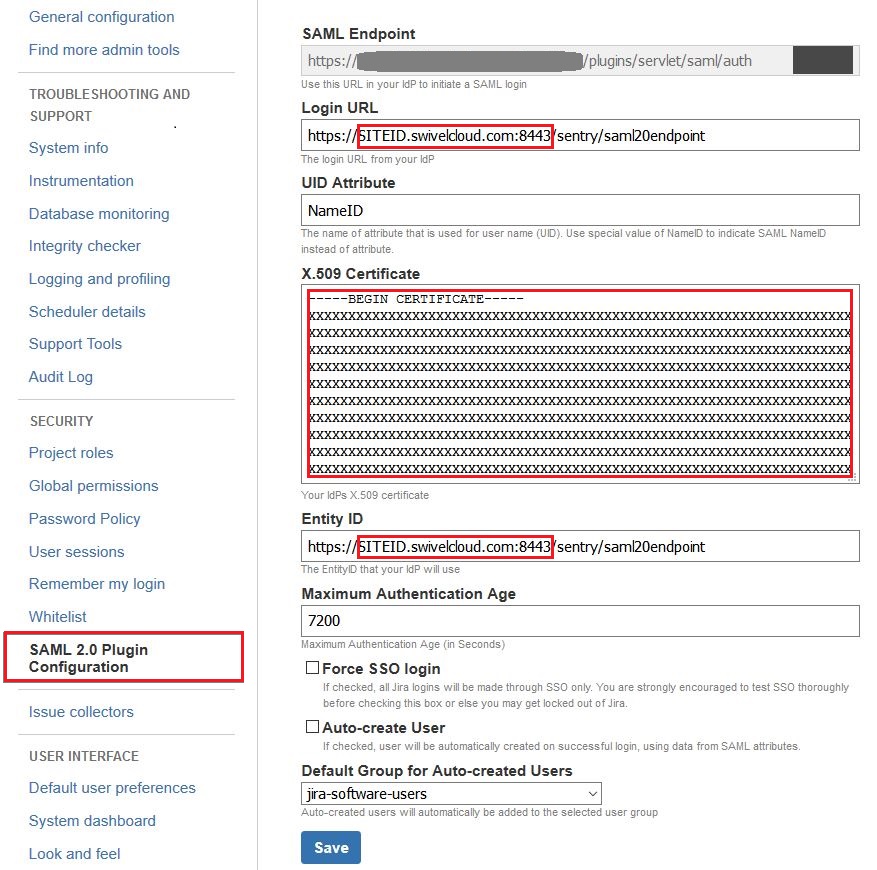
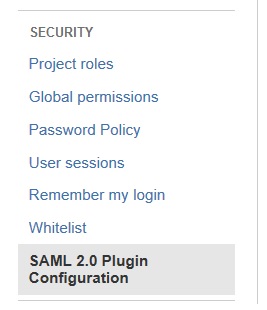
The plugin configuration screen is located on the left hand menu under Security:
Configure the settings as shown in the screenshot, being careful to replace your hostname in the highlighted areas. Leave NameID as it is.
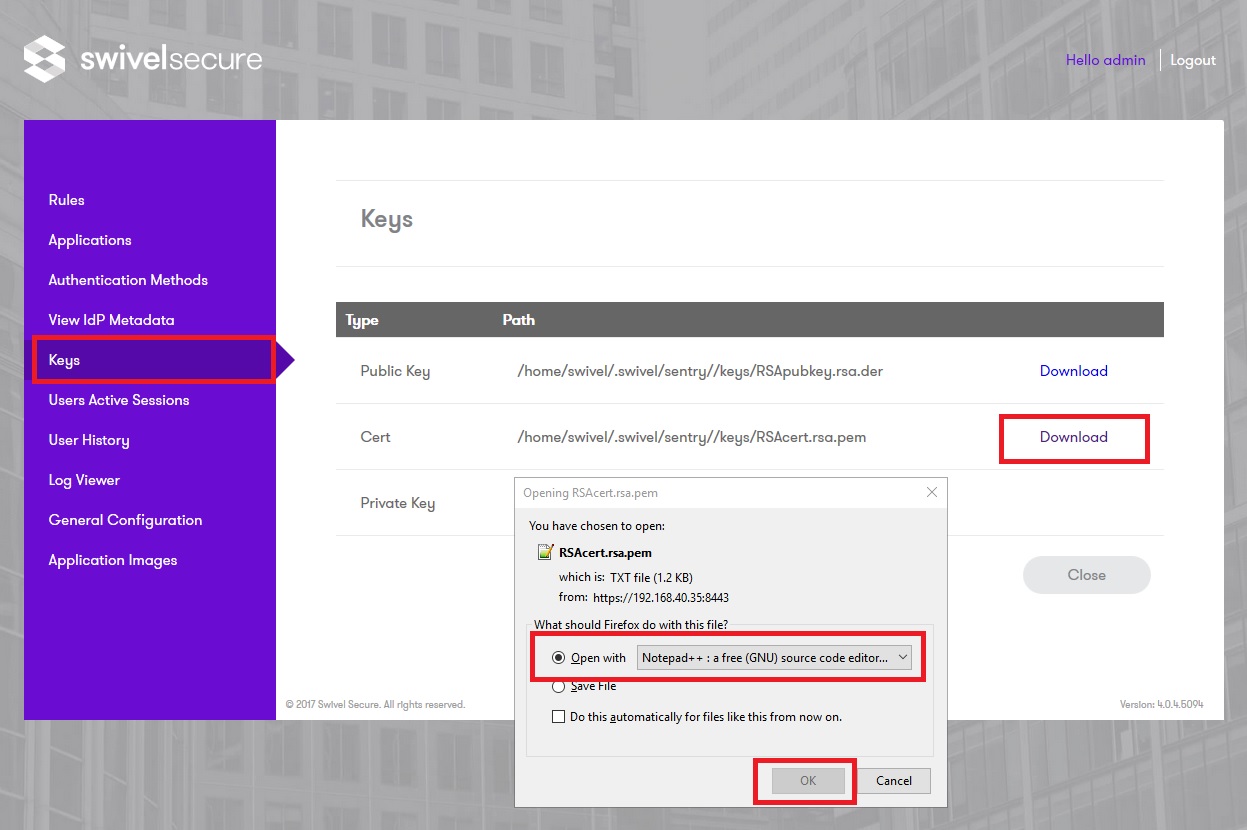
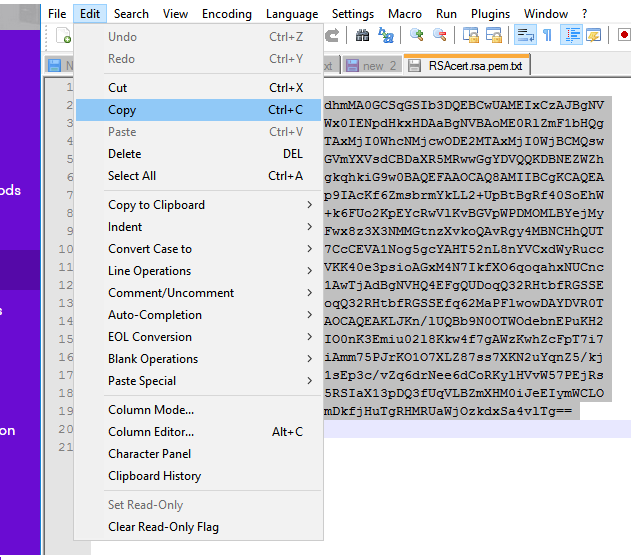
In the X.509 Certificate field, you will need to paste the Key from Swivel AuthControl Sentry. Navigate to your AuthControl Sentry Keys page and copy the certificate text into the SAML plugin in JIRA.
Once all the settings have been configured in the JIRA SAML plugin, save and apply the changes.
Setup AuthControl Sentry Application definition
First we should upload the JIRA logo. Find it using a Google Images search or copy it from here:
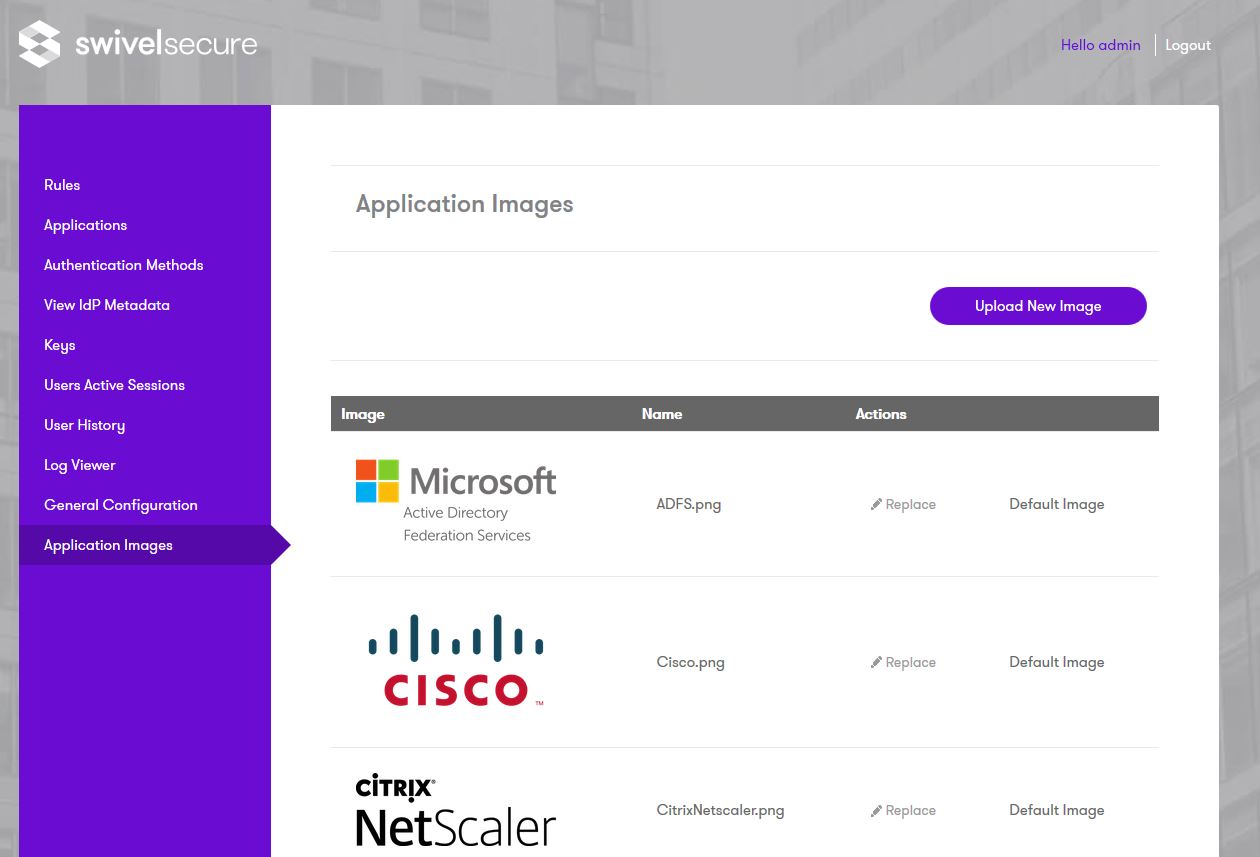
Login to the AuthControl Sentry Administration Console. Click Application Images in the left hand menu. Click the Upload Image button on the top right.
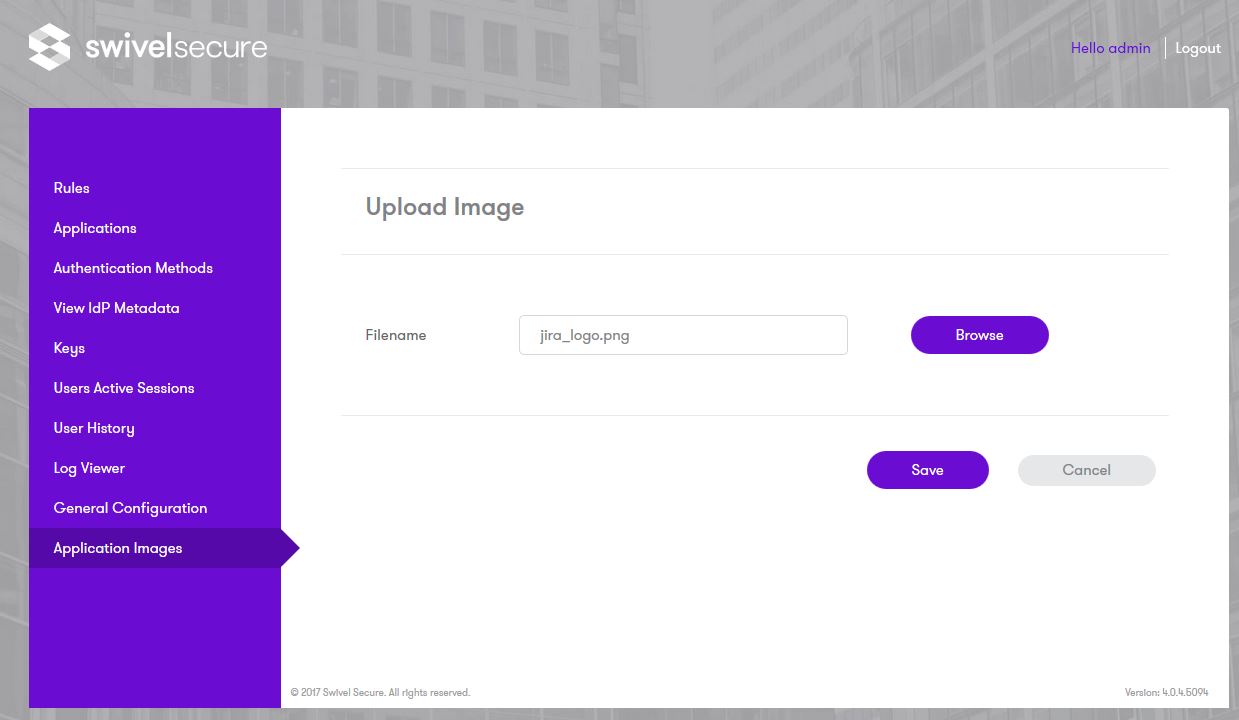
Browse to the Logo file you have saved:
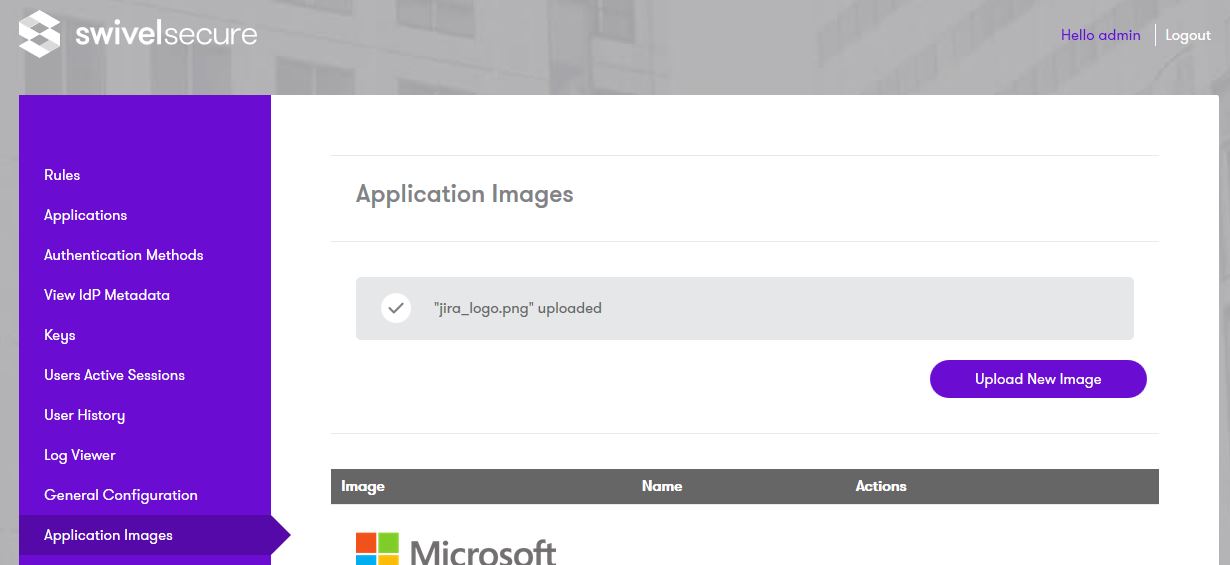
Then upload the image to the Sentry application:
The image should now be available to select, when we go to create a new Application definition for JIRA:
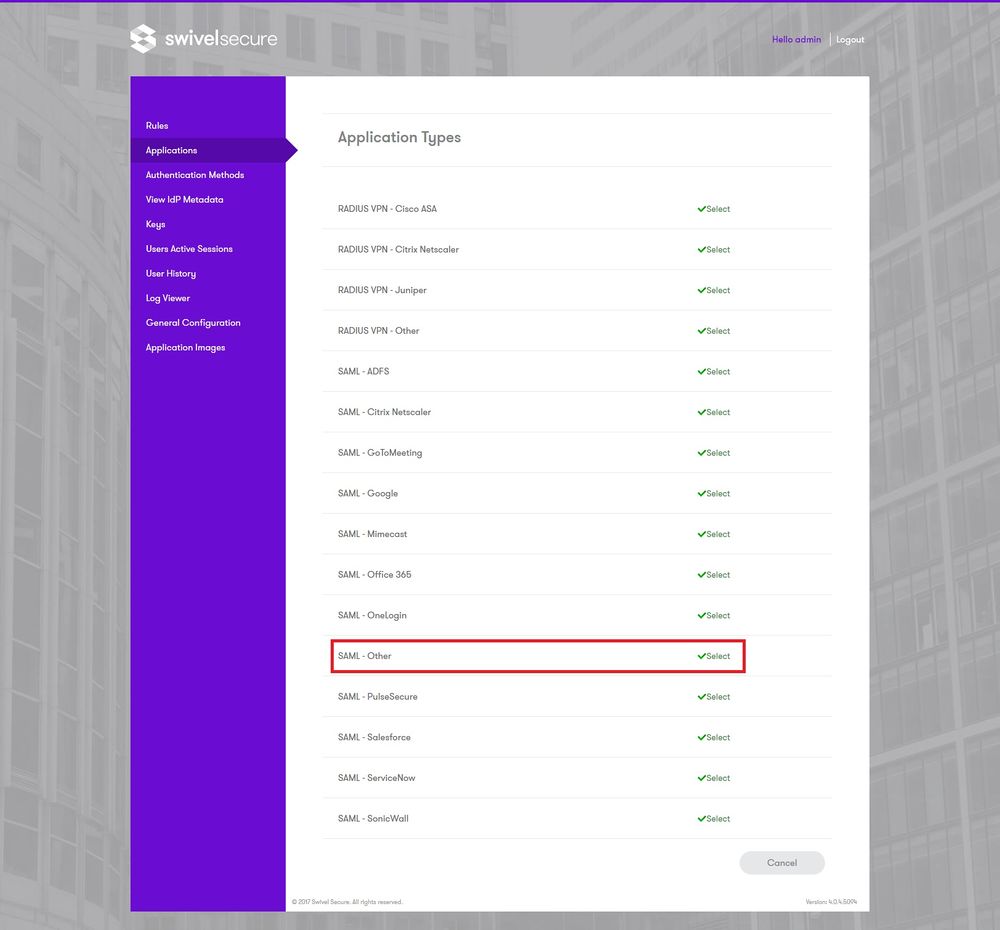
Login to the AuthControl Sentry Administration Console. Click Applications in the left hand menu. To add a new Application definition for JIRA, click the Add Application button and select SAML - Other type.
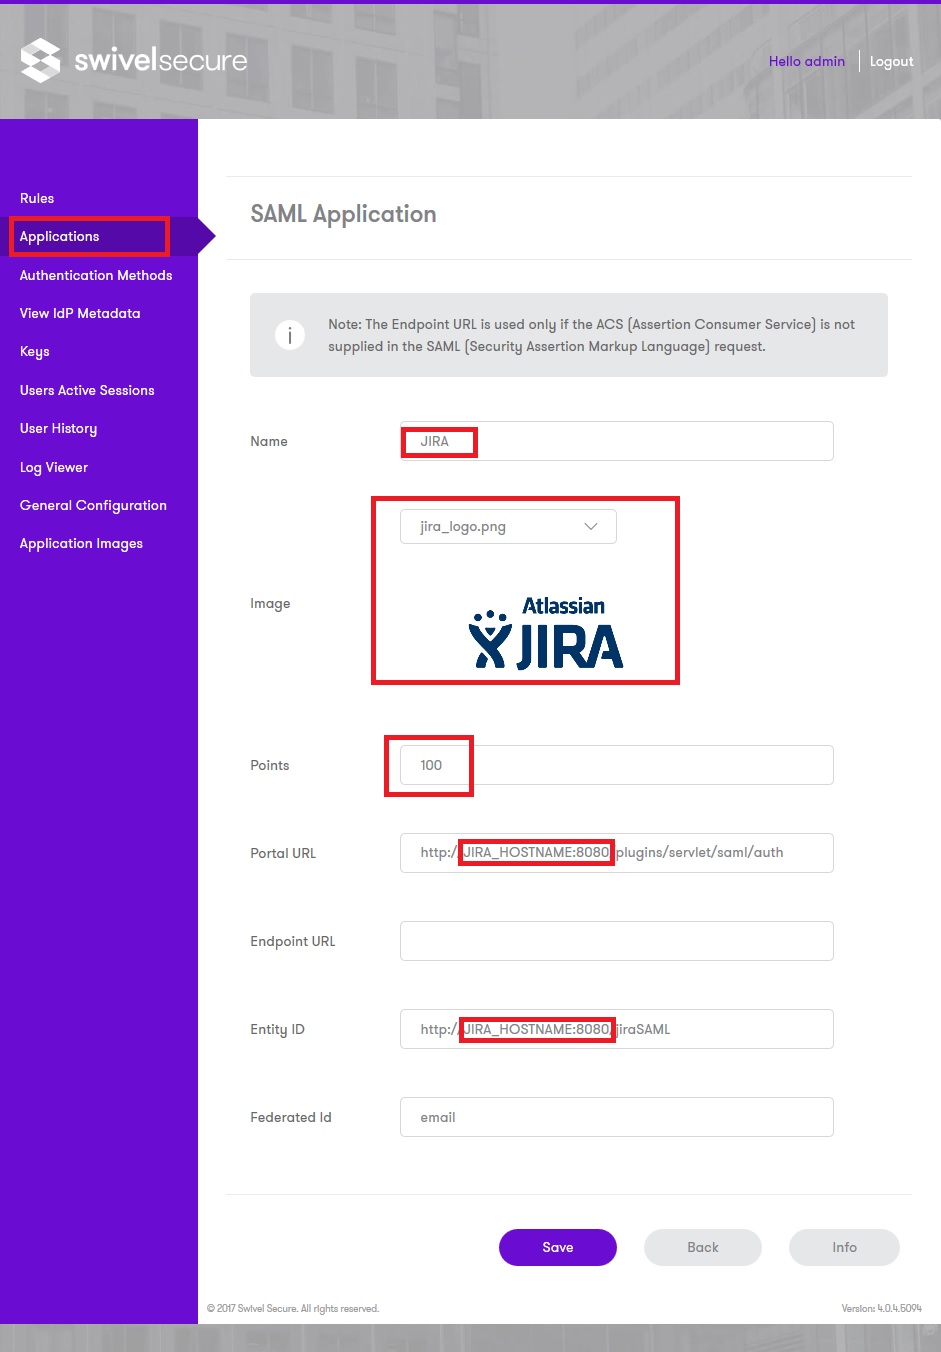
Name: JIRA
Points: 100 (the number of points the user needs to score from their Authentication Method in order to successfully authenticate to this Application)
Portal URL: URL to access to JIRA e.g. http://JIRA_HOSTNAME:8080/plugins/servlet/saml/auth
Endpoint URL: Leave blank - not required
Entity ID: Identifier of the JIRA SAML request e.g. http://JIRA_HOSTNAME:8080/jiraSAML
Federated Id: email
Setup AuthControl Sentry Authentication definition
As an example here we will be using Turing authentication as the Primary method required for JIRA authentication.
Login to the AuthControl Sentry Administration Console. Click Authentication Methods in the left hand menu. Click the Edit button against the Turing option in the list of Authentication Methods. Give this Authentication Method 100 points. This will mean that when a login attempt is made to the JIRA Application, this Authentication Method will be offered during login. (Please read about AuthControl Sentry Rules and familiarize your self with AuthControl Sentry here )
Testing authentication to JIRA via Swivel AuthControl Sentry
This should be the final step after all previous elements have been configured.
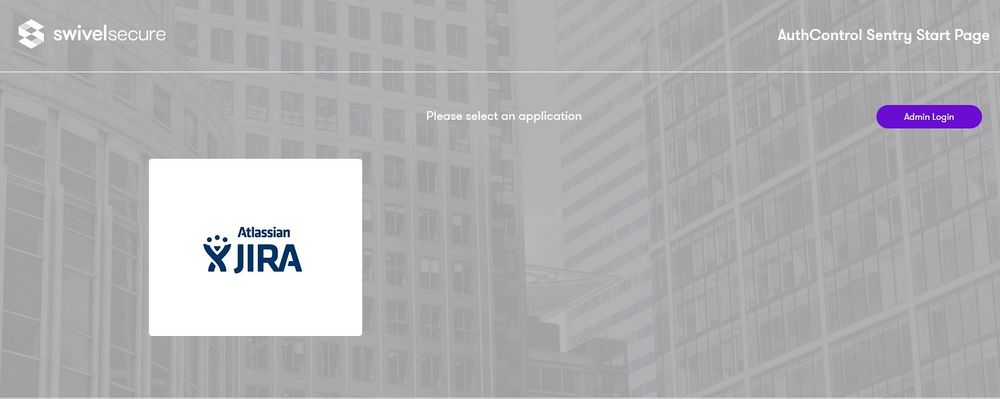
Visit your AuthControl Sentry Page with your public DNS entry of your Swivel AuthControl Sentry server, e.g. https://mycompanysentrydomain/sentry/startPage. On a Start Page you will be able to see a new JIRA Icon on which you can click and proceed with authentication (as you would by going straight to the JIRA page)
When you visit this URL you will notice that the domain should redirect to the identity provider login URL that you setup.
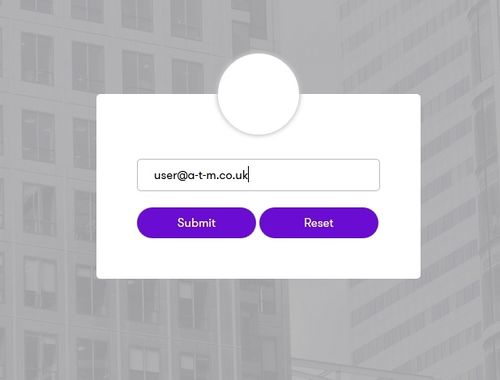
Once you have submitted your username. You should be presented with the Sentry username page.
In this login example we are using the email as a username.
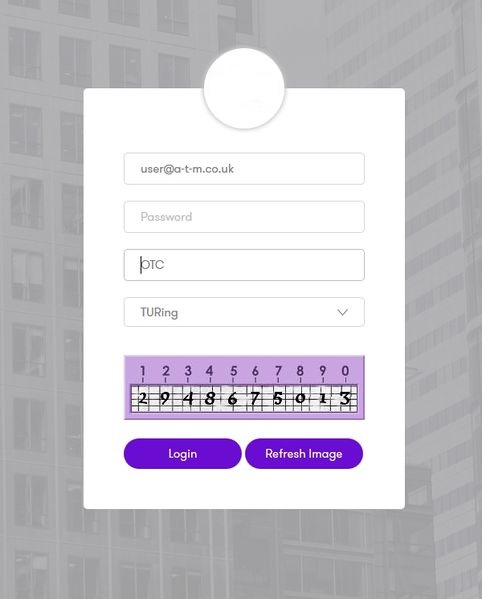
Once you have submitted your username. You should be presented with the page of the Authentication Method which can score enough points to match the points required by the JIRA Application definition.
After we enter our authentication credentials we successfully will see the JIRA account that we tried to access.
Troubleshooting
There are various logging components available for this particular integration which can aid in diagnosis at different points during authentication.
   The Swivel Core has a Log Viewer menu item which can reveal information concerning user status e.g. is the user locked, has a session been started for the image request;
   The Swivel AuthControl Sentry has a View Log menu item which provides details about the SAML assertion and response received from JIRA and can be useful for comparison with the Google SAML Assertion Validator output;
It is crucial when troubleshooting, to pinpoint where the authentication is failing. For example, you may find that the Swivel Core logs show a successful authentication (which would indicate that the user has entered their Password and OTC correctly), but the AuthControl Sentry logging shows that there is a problem with the SAML assertion.
Two common issues which can be diagnosed with the validator are:
   Certificate or decryption issues;
       Can AuthControl Sentry find the Certificate locally, is it the correct one?
       Has the correct Certificate been uploaded to JIRA?
       Does the Repository -> Attribute name being used actually map to a Repository attribute? Has a User Sync occurred in the Swivel Core since modifying this?

