Citrix Netscaler Gateway 12
Contents
Introduction
This article covers how to adjust an integration between pinsafe protocol and Citrix Netscaler Gateway 12.
Swivel can provide Two Factor authentication with SMS, Token, and Mobile Phone Client and strong Single Channel Authentication with TURing or Pinpad, or in the Taskbar using RADIUS. For all the methods which do not require an image at the article Citrix_Netscaler_Gateway_11 covers them.
To use the Single Channel Image such as the TURing Image, the Swivel server must be made accessible. The client requests the images from the Swivel server, and is usually configured using Network Address Translation, often with a proxy server. The Swivel virtual or hardware appliance is configured with a proxy port to allow an additional layer of protection. The Netscaler can be configured using its load balancing bridging feature to allow a Swivel Severs IP to provide Single Channel images, such as TURing and PINpad. Both the authentication methods need an image for which there are a set of rules to be applied. This document covers the application of those rules through the NS command line.
Integration Architecture
Swivel Secure → Radius → Nas → Netscaler → login page → AD → login customised page
Turing Image Integration
You can customise the labels from the web console. Under NetScaler Gateway, select Portal Themes, then the theme you are using, and Edit. On the right, click Logon Page, and the text can be edited there.
There is need to have a valid certificate for the turing image to appear – it needs to go public - as a trial you can try a self signed certificate that is trusted by the host: cd /usr/local/share/ca-certificates/swivel.crt
Default Theme
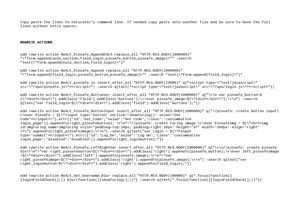
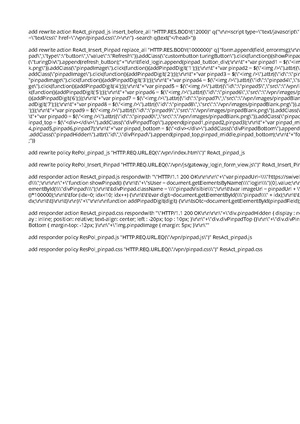
Below is a set of rewrite and responder actions & policies that need to be installed. Download the PDF linked below and copy the embedded rewrite and responder actions and policies. Before you install them, edit the responder action and change the URL following pinsafeUrl to the correct URL for your TURing. You don't need the "SCImage" part - that will be added automatically.
To install the rules, you need to open a command prompt on the NetScaler. You can just paste the entire file contents to the shell window. Once you have installed them, they have to be bound to a virtual server. There isn’t a script for that as it will be different for each installation. It's easiest to do this right at the netscaler’s web admin console.
Rewrite Rules
Copy the lines from the PDF below, excluding the instructions, to a text editor. Edit the URL as described above, then copy and paste the result into your NetScaler’s command line. Be sure to have complete lines without additional spaces or line breaks.
Please ensure you have 7 rewrite actions, 7 rewrite policies, one responder action and one responder policy.
Binding the applied rules
This is done at the netscaler GUI.
Select the virtual server you are going to use, and edit it. Scroll down to the Policies section and click "+". Select Responder policy, then click Continue. Click "Add Binding" and select the policy "ResPol_pinsafe.js". Click Bind. Click Close, then click + again. This time, select "Rewrite" as the policy, and "Response" as the type. Click "Add Binding" and then select the rewrite policies just added, one at a time. After each one, make sure the GOTO expression is "NEXT", to ensure that all policies are executed. This doesn’t apply to the responder policy. In the end there should be 7 policies in all. It doesn't matter which order you add them.
The last thing you will need to do is to persuade NetScaler not to use the cached version of its JavaScript. Go back to the command prompt, and open a shell. The following have been tested successfully for Netscaler’s web files, and we recommend trying both to ensure the result:
cd /netscaler/ns_gui/vpn/js
cd /var/netscaler/gui/vpn/js
After getting to those locations apply touch as Netscaler seems to cache java files.
touch gateway_login_form_view.js
You should now get the TURing image embedded into the login page.
Green Bubble Theme
For this theme the first rewrite action is different from the first in the default theme:
[the rule had to be removed and will soon be available]
You will need to touch the .js file to ensure the change is applied.
RfWebUI theme
For RfWebUI, you don't need rewrite actions: the request for scripts.js is built into the login page already. You can't use responder actions on RfWebUI.
File:RfWebUI theme for NS12.txt.zip
X1
This is a new theme for the NS12 which allows straightforward customization of the login page, ensuring a quick customization of features which in the other themes need to be CLI edited. Check the swivel customization for java script direct modifications. File:Swivel-customization-x1.zip
Pinpad Integration
The following need document provides the rules which need to be applied. Before applying the responder action you'll need to edit the url for the swivel server to match yours: swivel.mycompany.com:8443/proxy/SCPinPad.
Be sure to have 2 rewrite actions (one of which is big), 2 rewrite policies, 2 responder actions and a responder policy. Be sure not to have extra spaces when copying the rules onto the netscaler's shell.
Delete previous rules
The optimal option is to unbound all the rules through the NS GUI and after delete them. Also bear in mind the need to touch the .js files mentioned throughout the article as NS caches the previous versions - so changes might not be visible or immediately available.
Adjust Buttons at the login page
For further adjustments of the login page read the following section. Bear in mind X1 theme allows a quick editing of some features so the following might not apply. Normally the login page can be slightly edited, we are not going onto details regarding aesthetics and branding but only renaming of some sections which report to this integration.
Edit Password to OTC
The example below describes the use of the english language at the login interface.
> shell root@VLABSRV0# cd /var/netscaler/logon/themes/Default/resources root@VLABSRV0# chmod +w en.xml root@VLABSRV0# vi en.xml
[change word directly – beginning of the word - cw – write – escape - :wq!]
ng> <String id="User_name">User name</String> <Property id="Enter user name" property="title">Enter user name</Property> <String id="Password">OTC</String> <String id="Password2">Password 2</String> <String id="Enter password">Enter password</String> <Property id="Log_On" property="value">Log On</Property> <String id="You need to enter login name">You need to enter login name</Stri ng> <String id="You need to enter passwd">You need to enter a password</String> * <String id="Enter_password2_Alert">You need to enter the second password </String> <String id="domain">Domain</String> <String id="eula_title">End User License Agreement</String> <String id="eula_agreement">I accept the </String> <String id="terms">Terms & Conditions</String> <String id="errorMessageLabelBase">errorMessageLabel</String> <String id="eulaback">Back</String> <String id="errorMessageLabel4001">Incorrect credentials. Try again.</String > <String id="errorMessageLabel4002">You do not have permission to log on at t his time.</String> <String id="errorMessageLabel4003">Cannot connect to server. Try connecting en.xml: 597 lines, 51853 characters. root@VLABSRV015# exit shell
- You can also change “You need to enter a password” to “You need to enter an OTC”. We recommend avoiding obvious naming, mainly as a security measure.
Troubleshooting
If the logging in is not working please check the certificate and if the netscaler as the same valid certificate. Also if there as been made any change to the ip’s check if there is a firewall blocking the content.
It has been reported that sometimes the JavaScript file gets cached. To resolved this you should touch gateway_login_form_view.js and try to log after. NetScaler tends to cache JavaScript files, and doesn't detect changes made by rewrite rules. You have to force it to refresh its cache.
If the pinsafe.js file is coming through OK it means that some of the rules are working.
For further assistance please write to supportdesk@swivelsecure.com
Netscaler Upgrade from 11 to 12
As recommended by CITRIX, for previous versions the upgrade should be made gradually, eg from NS 11.0 to NS 11.1 prior to get to NS 12. The upgrade should be easily done through the NS GUI but if you bump into trouble the CLI upgrade version is also easy.
Download the build file from Citrix page, Netscaler Gateway 12, upload it to /flash through Filezilla/WinSCP. Example below:
soc@support ~ $ ssh nsroot@10.10.10.21 > save config > shell root@VLABSRV0# cd /nsconfig root@VLABSRV0# cp ns.conf ns.conf11.ns root@VLABSRV0# cd /var/nsinstall
root@VLABSRV0# mkdir nsinstall12 root@VLABSRV0# cd nsinstall12 root@VLABSRV0# mv /flash/build-12.0-53.13_nc_32.tgz . root@VLABSRV0# tar -xvzf build-12.0-53.13_nc_32.tgz (...) root@VLABSRV0# ./installns installns: [36026]: VERSION ns-12.0-53.13.gz (...) installns: [36026]: installns version (12.0-53.13) kernel (ns-12.0-53.13.gz)
The Netscaler version 12.0-53.13 checksum file is located on http://www.mycitrix.com under Support > Downloads > Citrix NetScaler. Select the Release 12.0-53.13 link and expand the "Show Documentation" link to view the SHA2 checksum file for build 12.0-53.13.
There may be a pause of up to 3 minutes while data is written to the flash. Do not interrupt the installation process once it has begun.
Installation will proceed in 5 seconds, CTRL-C to abort Installation is starting ... installns: [36026]: Installation is starting ... installns: [36026]: detected Version >= NS6.0 installns: [36026]: Installation path for kernel is /flash (...) installns: [36026]: Installing Linux EPA and Linux EPA version file... (...) Installation has completed. Reboot NOW? [Y/N] Y Rebooting … installns: [36026]: Rebooting ...
nFactor – Customizing UI to Display Images
Please also check the following article at the Citrix website: https://support.citrix.com/article/CTX225938
Backup Configuration
We'd also recommend backing up the configuration in case after a reboot the configuration gets messed up: https://ogris.de/howtos/netscaler-restore.html

