Juniper OneTouch
Contents
[hide]- 1 Overview
- 2 Prerequisites
- 3 Baseline
- 4 Architecture
- 5 Installation
- 6 Verifying the Installation
- 7 Uninstalling the Swivel Integration
- 8 Troubleshooting
- 9 Known Issues and Limitations
- 10 Additional Information
Overview
This document is intended to supplement the the OneTouch Mobile guide and the OneTouch Voice guide for using the Swivel Juniper OneTouch Demo application.
Prerequisites
Swivel 3.10.4
Juniper 7.x or 8.x
Nexmo Account (or other Telephony provider) for OneTouch Voice telephone-based solution
Latest version of the Swivel Appliance Proxy available from Downloads
Swivel OneTouch Application demo available from Downloads
Juniper Custom login pages OneStage.zip or TwoStages.zip
Baseline
(The version tested with)
Swivel 3.10.4
Juniper 7.x
Architecture
See OneTouch Voice and OneTouch Mobile
Installation
One Touch Demo Application Installation
Install the Swivel OneTouch Demo Application
Swivel Integration Configuration
Configure the Swivel server and users as detailed in this guide OneTouch Voice or OneTouch Mobile.
Juniper One Touch Integration
Modifying the Custom login Pages
Modify the Juniper login pages either for OneStage or TwoStage authentication.
For Single Stage authentication
Open the OneTouchOneStage.zip file
Modify the LoginPage.thtml file
edit the 2 URLs to access to your OneTouch demo app:
e.g.: http://localhost:8081/onetouchdemo/onetouch?returnurl=
Save the changes and create a zip. NOTE: the zip has to contain just the files and not the onetouch folder or itself a subfolder.
For Two Stage Authentication
Open the OneTouch2Stages.zip file
Modify the Defender.thtml file
edit the URLs to access to your OneTouch demo app:
e.g.: http://localhost:8081/onetouchdemo/onetouch?returnurl=
Save the changes and create a zip. NOTE: the zip has to contain just the files and not the onetouch folder or itself a subfolder.
Uploading the Custom Sign in pages
As with the Swivel Juniper integration, the custom pages need to be uploaded and assigned to a signing-in policy and realm.
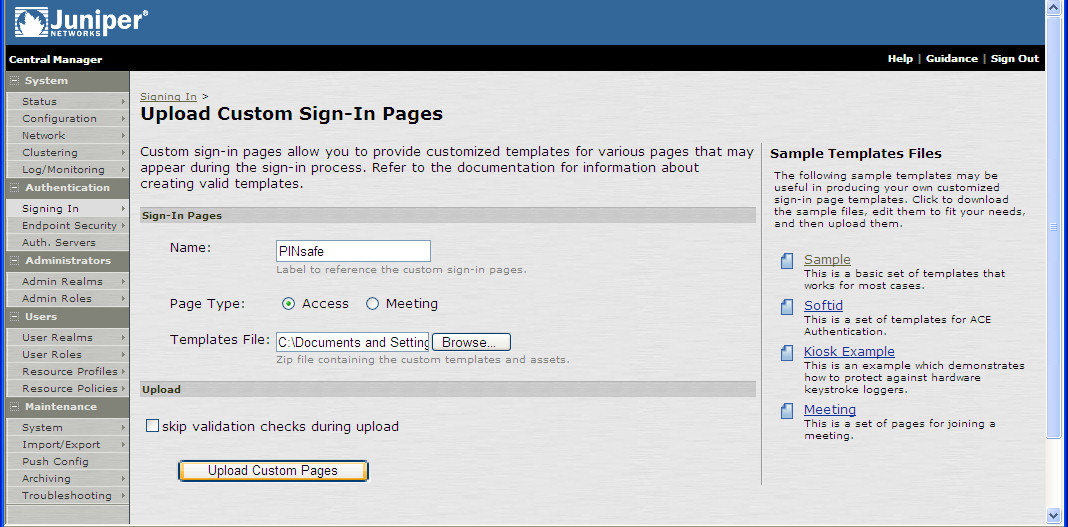
Ensure all the modified files are included with the zip file to upload to the Swivel server. On the Juniper select Signing In/Sign-in Pages then click on Upload Custom Pages.
Enter a Name for the Custom page, then use Browse to find the location of the Templates file. Then click on the Upload Custom Pages, observe any errors that may occur.
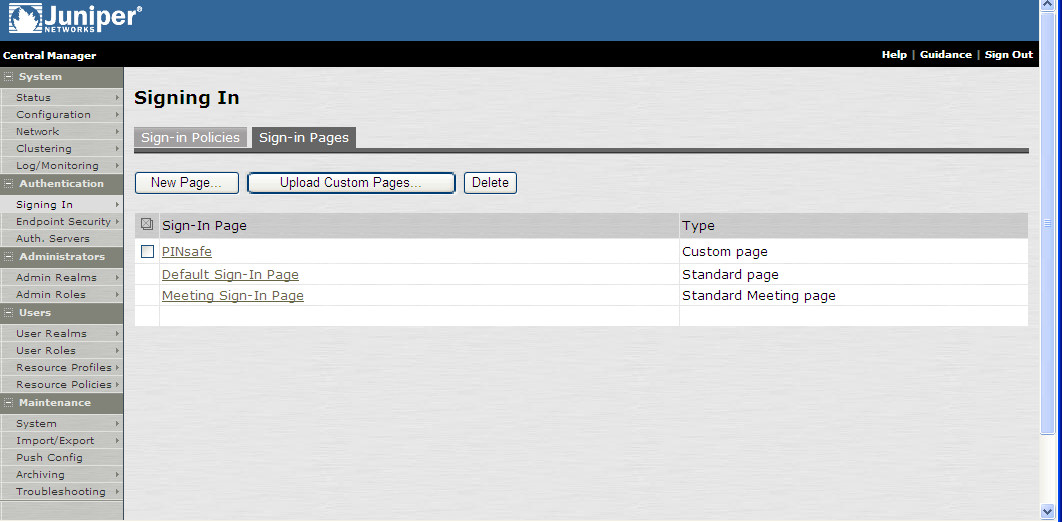
The new signing in page should be listed.
RADIUS Authentication Server Configuration
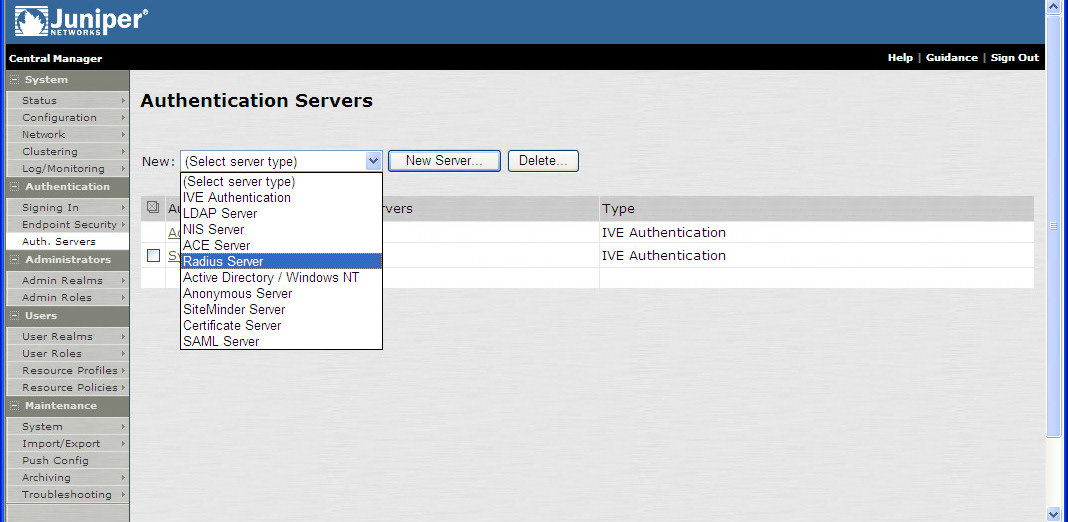
On the Juniper Server select Authentication Servers then select RADIUS Server from the drop down menu, and click on New Server.
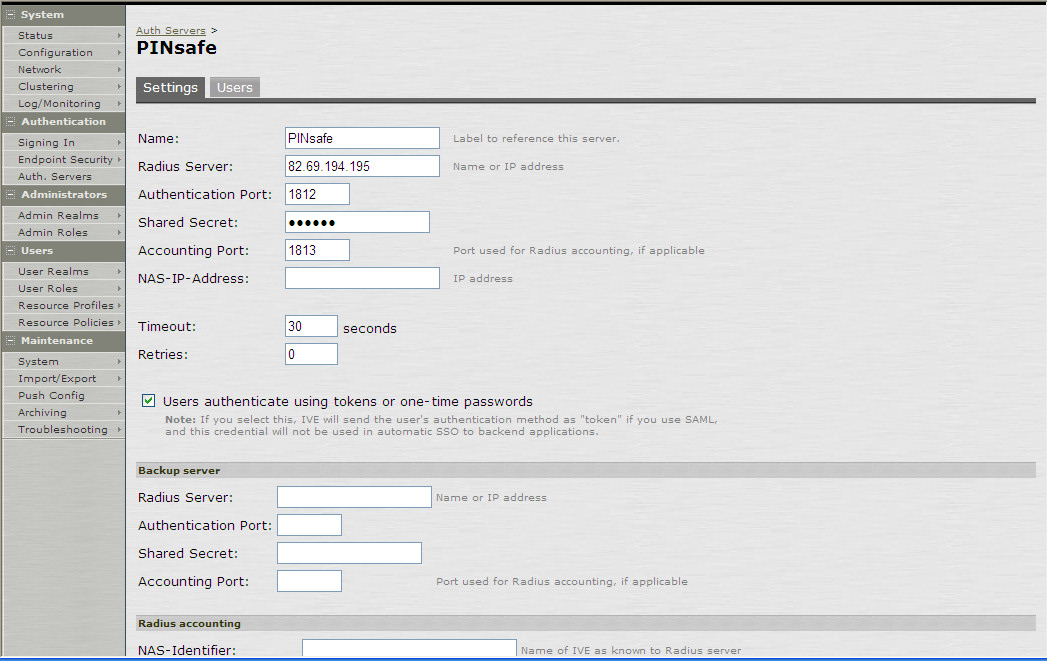
The following information is required:
Name: A descriptive name for the RADIUS server
RADIUS Server: The Swivel server IP/Hostname (Use the Swivel server real IP address not the VIP, multiple servers can be defined as Primary and secondary servers).
Authentication Port: the port used to carry authentication information, by default 1812
Shared Secret: The shared secret that has been entered on the Swivel server
Accounting Port: the port used to carry accounting information, by default 1813
NAS-IP Address: the Juniper interface used for communication, usually left empty
Users authenticate using tokens or one-time passwords Ensure this box is ticked
Backup server, Enter the details of any additional Swivel servers which can be used for authentication.
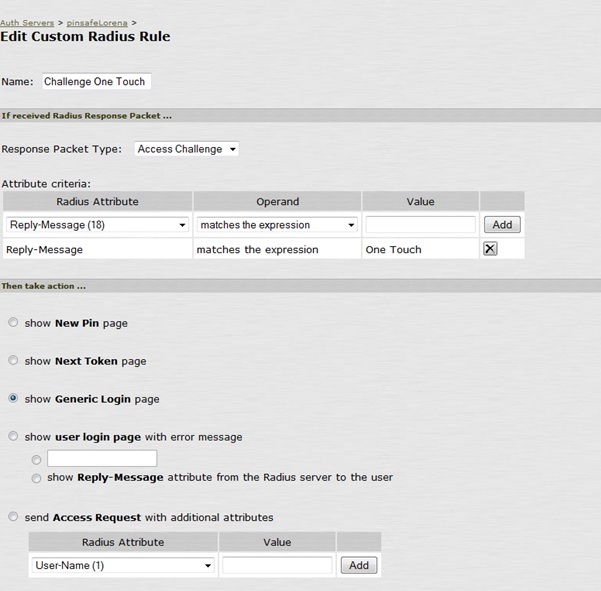
For Two Stage Authentication Go to the auth, select the server used for one touch and add a new challenge rule. The value has to be the same as configured on Defender.thtml and radius_challenges.txt on the Swivel core.
Example Rule:
Name: Challenge One Touch
Response Packet Type: Access Challenge
RADIUS Attribute: Reply-Message
Operand: matches the expression
Value: One Touch
Authentication Realm Configuration
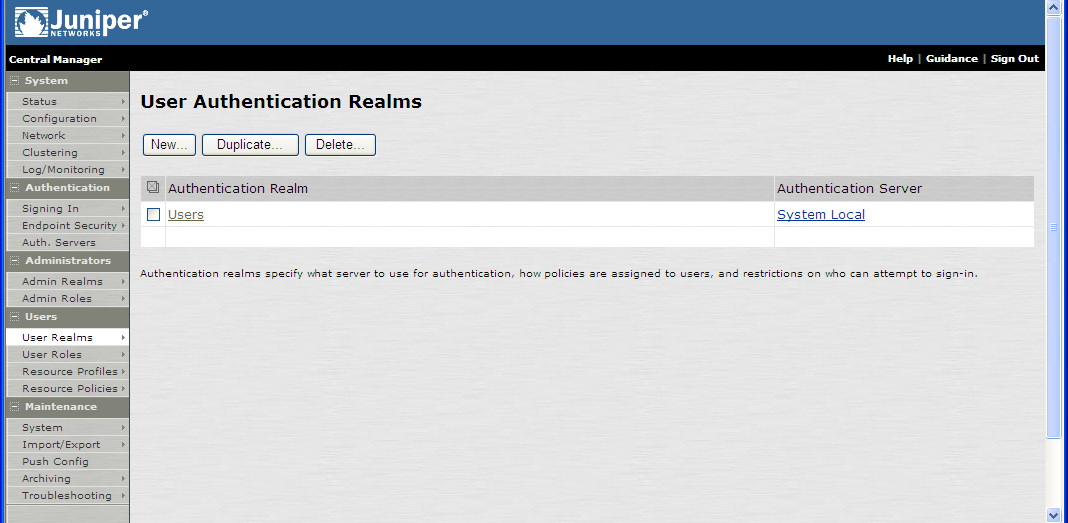
Authentication realms determine which method of authentication will be used. On the Juniper select User Realms, and either create a new Realm with the New button or or modify an existing realm by clicking on it.
Additional Installation Options
Verifying the Installation
Uninstalling the Swivel Integration
Troubleshooting
Known Issues and Limitations
Additional Information
For assistance in the Swivel installation and configuration please firstly contact your reseller and then email Swivel Secure support at support@swivelsecure.com.

