Firewall Appliance Configuration
Contents
[hide]Overview
Each Swivel appliance has a firewall protecting access to that sever. This document details how to add and change the Firewall configurations on Swivel appliances. For information on configuring Port Address Translation, see How to run PINsafe on non-default ports, this allows ports such as 443 or 80 to be used. Forinformation on ports used by Swivel appliances see Ports.
The Swivel Administration console access can also have IP access control, see Filter IP How to Guide
Prerequisites
Swivel Appliance 2.x
Configuring the Firewall
Webmin
Configuration of the firewall is usually carried out using Webmin
Firewall Add Rule
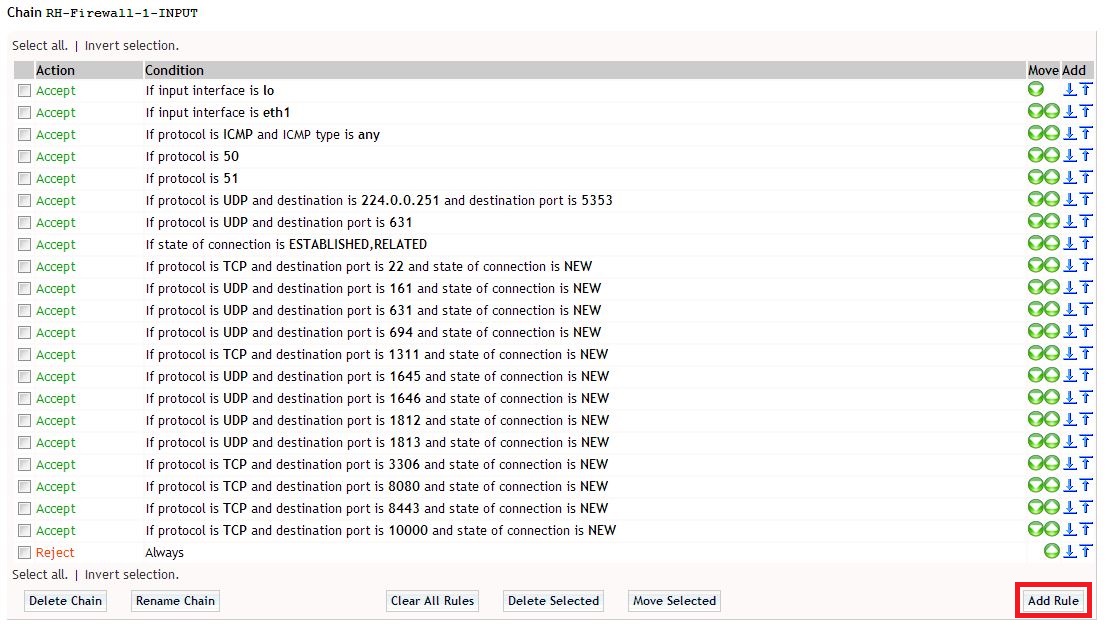
Once logged in select Networking then Firewall. Locate the Chain RH-Firewall-1-INPUT then below this click on Add Rule.
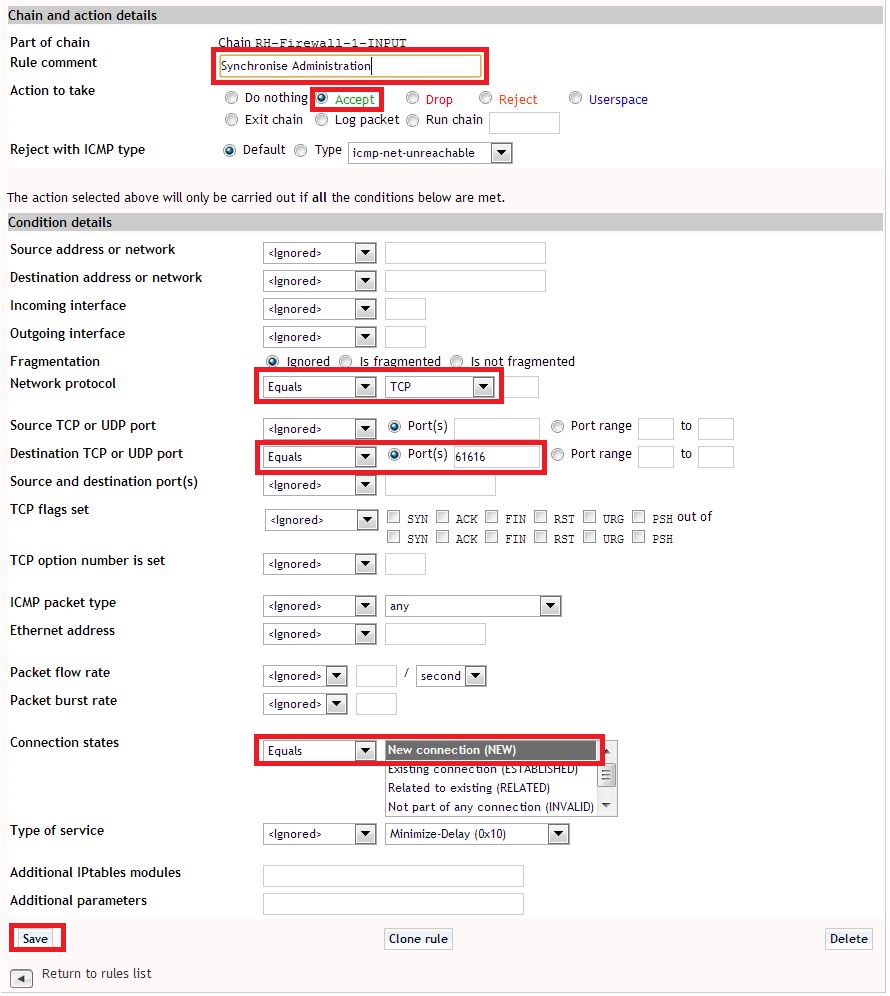
Enter the following parameters:
Rule Comment description of the rule
Action to take select Accept to allow the rule
'Network Protocol select Equals and TCP or UDP as appropriate
'Destination TCP or UDP port select Equals and set the port required
Connection states select Equals and New connection (NEW)
When complete click on Save.
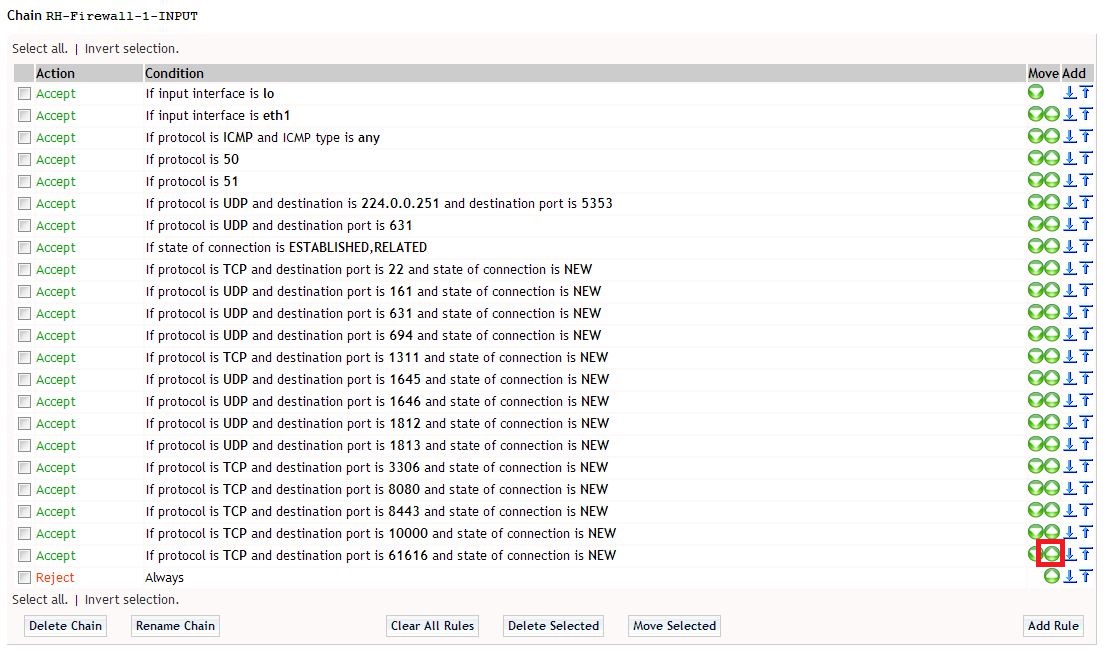
Change the rule priority
Increase the rule priority so that it is above the Reject rule by clicking on the green up arrow.
Apply Configuration
Click on Apply Configuration to make the firewall rules active.
[Image:Swivel Appliance Webmin Firewall apply configuration.JPG]]


