Microsoft ADFS 4 and 3 Authentication
Contents
[hide]Introduction
This article describes the Swivel Authentication Provider for ADFS 4, which is included in the Microsoft Windows Server 2016 Operating System, and ADFS 3, which is included in the Microsoft Windows Server 2012 R2 Operating System. For ADFS version 2 see Microsoft ADFS 2 Integration
Version History:
- 1.2.0.0 Updated to support ADFS 4.0
- 1.1.0.0 Added the ability to customise the page style. Not released.
- 1.0.6.1 Added option not to show TURing or PINpad automatically
- 1.0.5.3 Fix for special characters in username
- 1.0.4.1 Various bug fixes and added logging
- 1.0.3.2 Advanced connections added. Fixed language strings configuration.
- 1.0.2.1 Bug fix: in certain circumstances, the first security string would not work and refresh was required to authenticate
- 1.0.1.2 Fix to work with secondary ADFS servers
- 1.0.0.0 Initial release
Requirements
This solution works with Windows Server 2016 and Windows Server 2012 R2 64-bit, with the ADFS role installed. This should be installed and tested before installing the Swivel provider.
The Swivel proxy component can be installed separately, either on the ADFS proxy or any other Windows PC with IIS and ASP.Net 4.5 installed, and exposed publicly, either directly or through a proxy.
The installer for the Swivel ADFS Authentication Provider can be obtained on request to supportdesk@swivelsecure.com.
Before configuring and testing the ADFS Authentication Provider, the ADFS server should be added as an Agent to Sentry: see below.
Configure Sentry Agent
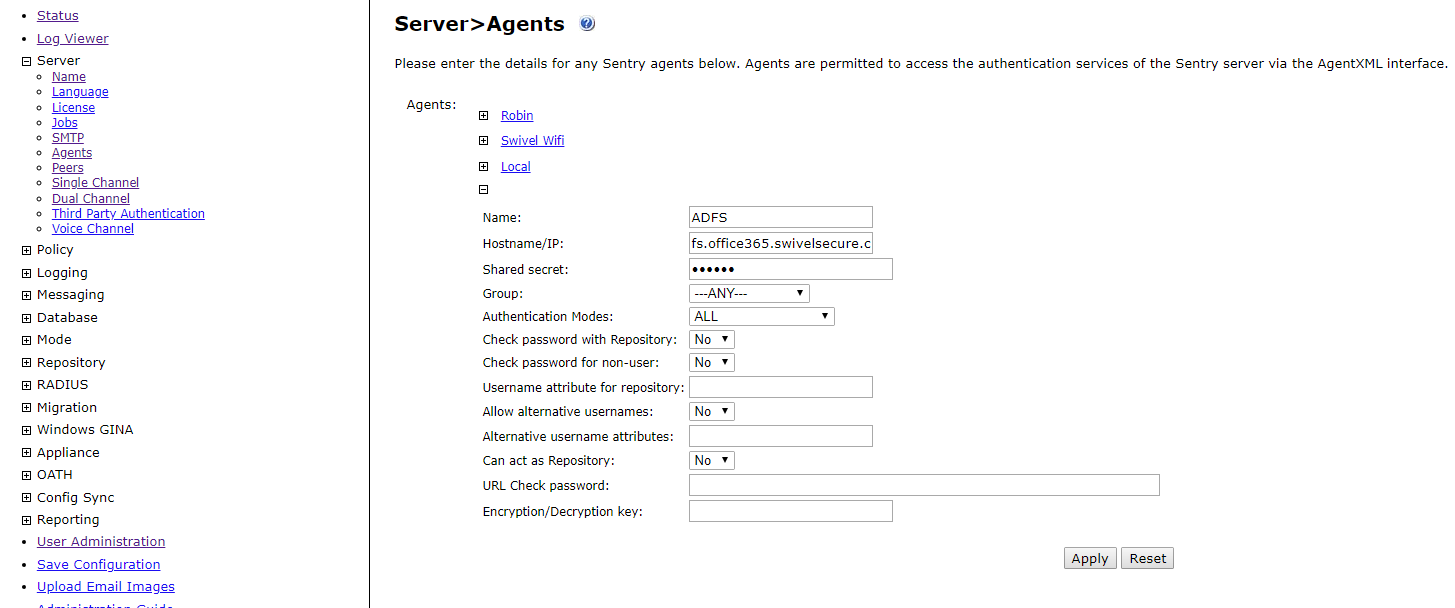
Log into your Sentry web administration. Select "Server" from the left-hand menu, then "Agents"
Click on the "New Entry" link at the bottom and enter your details as shown below.
The shared secret can be anything, but remember it, as you will need it for the Authentication Provider configuration
Installation
NOTE: If you are installing on the ADFS server(s) and one or more proxies (see below), you should install on the ADFS server(s) first.
NOTE: You must uninstall any old version before installing a new one. See the notes below on uninstalling - in particular, you need to remove the old provider from any authentication policies. Note that the settings are not deleted on uninstall, so when you install the new provider, the previous settings will still be there. However, you may need to recreate the web proxy.
If you have more than one ADFS server, you should install on the primary first. The installer automatically detects whether or not the server is a primary ADFS server, and adjusts the installation actions accordingly. However, when installing the proxy only on a non-ADFS server, you must manually disable the Authentication Provider option.
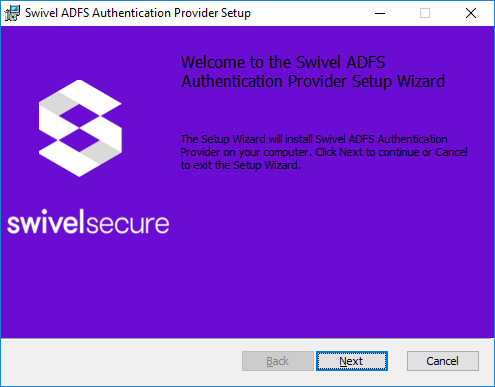
To install this product, download the installer from here, unzip the file SwivelAuthProviderInstall.msi from the download and double-click it. Note that you must be logged in as an administrator to install this product. If you are not logged in as administrator, open a command prompt as administrator, switch to the directory containing the msi file, and run the following command:
msiexec /i SwivelAuthProviderInstall.msi
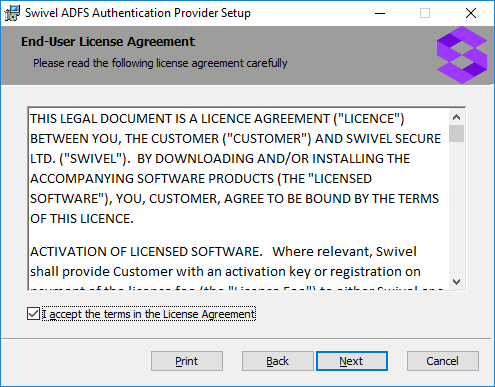
Accept the licence agreement and proceed to install.
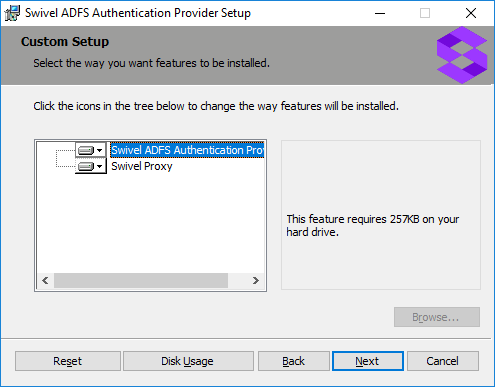
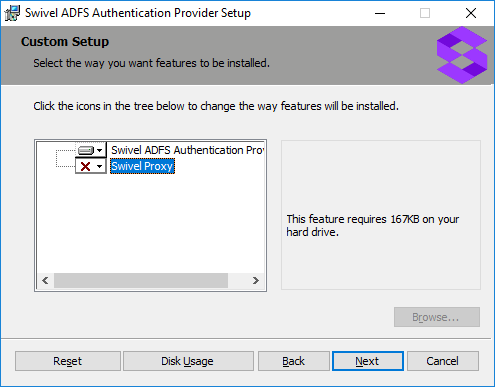
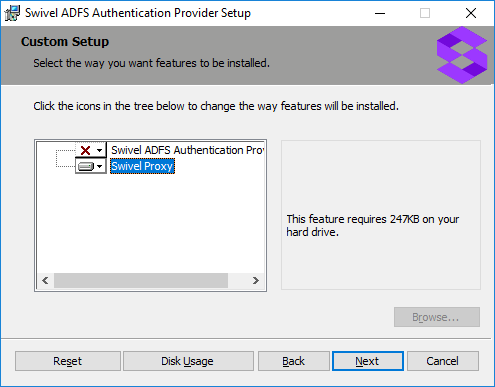
You will next be asked to choose whether to install the ADFS Authentication Provider, the Swivel proxy or both. There are a number of possible scenarios, summarized below.
- ADFS and IIS installed on the same public server, no proxy:
- Install both components on this server.
- Single ADFS server, no IIS:
- Install Authentication provider only. For Swivel single channel, you will need to provide some other method to display the TURing or Pinpad.
- ADFS server and ADFS proxy, IIS installed on the proxy:
- Install Authentication provider only on the ADFS server.
- Install proxy component only on the ADFS proxy.
- ADFS server and ADFS proxy, IIS not installed on the proxy:
- Install Authentication provider only on the ADFS server.
- No additional components are required on the proxy.
- Optionally, you can install the Swivel proxy on a third server with IIS installed, and proxy that through the ADFS proxy.
Note that, if you have not installed IIS (and ASP.Net 4.5) on the ADFS proxy, you do not need to install any components on the proxy. If you are using the ADFS proxy as a Swivel proxy, make sure that you only proxy the /adfs application through to the ADFS server, not the entire website.
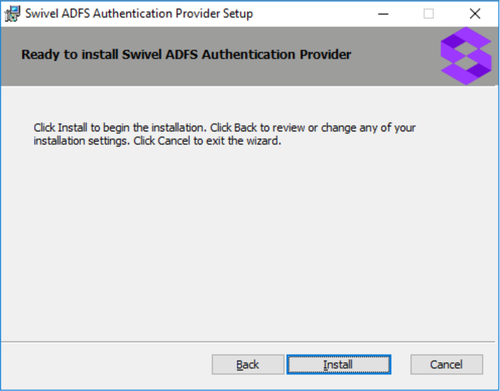
Once you have chosen your options, click Install:
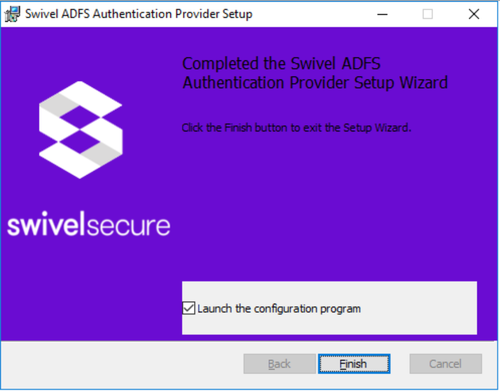
On the final screen, you will be prompted whether you want to run the filter configuration program.
Configuration
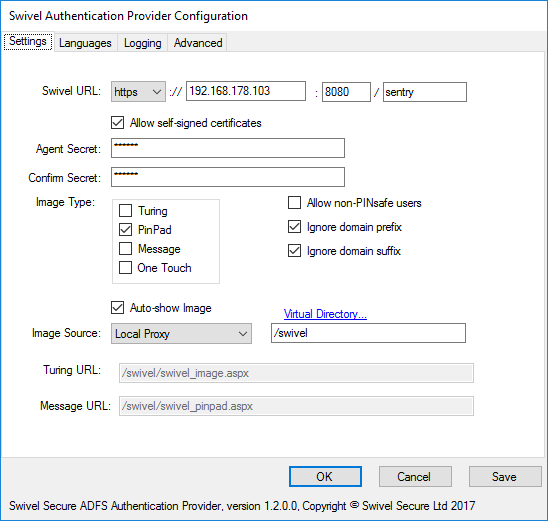
The configuration program for the authentication provider consists of 4 tabs.
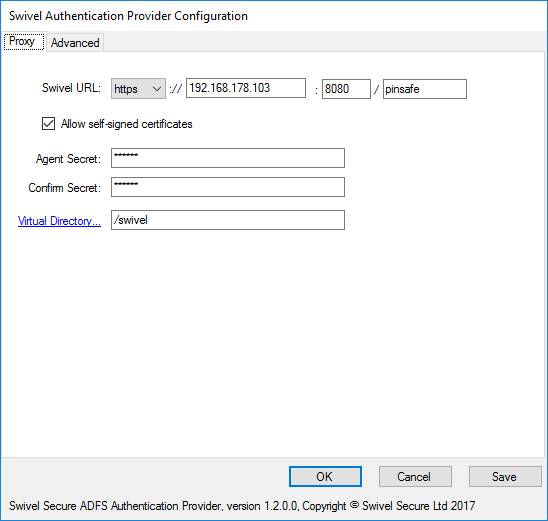
The Configuration program for the proxy only has 2 tabs, shown below.
Enter the URL for the Swivel server that will be used to authenticate users.
If the Swivel server uses HTTPS and does not have a valid, trusted certificate, check the option to Allow self-signed certificates (but see #Known Issues).
Enter the Agent secret for the Swivel twice: you should have previously created an Agent on the Swivel server corresponding to this ADFS server, and you should use the same secret here as you entered on that.
Image Type: You can choose to display any combination of TURing image, Pinpad, Message on demand or One Touch (Push). The option Auto-Show Image is only available if you select exactly one of these options. If you select more than one, the user will be shown a drop-down to select which authentication they prefer (including None).
Select Allow non-PINsafe users if you want users that do not have Swivel accounts to be able to authenticate without having to enter additional credentials. Generally, it is easier to manage this using Authentication Policies on ADFS.
Select Ignore domain prefix or Ignore domain suffix, depending on your Swivel usernames: typically, you will always ignore the domain prefix, unless you configure your Swivel repository to automatically add a prefix. You will need to ignore domain suffix if you are using sAMAccountName as the Swivel username (the default), but not if you are using userPrincipalName.
Image Source:
There are 3 possible options for Image Source:
- Swivel direct: the image will be delivered directly from the Swivel server to the end user. In this case, the Swivel server must be publicly visible, and the URL for the image will be constructed from the Swivel URL.
- Local Proxy: the image will be delivered by the ADFS server or ADFS proxy, using the proxy component of the authentication provider. In this case, the proxy component must be installed either on the ADFS server or on the proxy, which means that IIS must be installed on the appropriate server. see below for more details on using this option.
- Define manually: use this option if you have an alternative source for the TURing or Pinpad images. For example, if you have another Swivel integration, such as OWA, that provides an image proxy. This proxy must be to the same Swivel instance that is used for authentication, but does not have to be a direct connection. In this case, you must specify the full public URL for the image in the appropriate field below.
To directly access a Swivel appliance through a NAT etc, then the URL should be https://URL:8443/proxy/SCImage
The languages tab allows you to change the messages used for various parts of the login page. You can either enter a new locale ID if you know the locale ID for the language you want to use. See here for a list of Microsoft-assigned locale IDs. Alternatively, if you know that most of your users will be using a particular language, you can change the default messages.
Note that in ADFS 4.0, you must have a language defined for the locale of the ADFS service user, which will typically be the locale of the server operating system. To facilitate this, the installer automatically detects the locale of the service user and creates a set of phrases for that locale. Do not delete this locale, or ADFS will fail to authenticate.
When you create a new locale, or one is created for you automatically, all the phrases are copied from the English phrases. Swivel Secure does not currently provide messages for any other language.
The Logging tab allows you to control how much information is logged by the provider, to view existing logs and to remove old logs. By default, nothing is logged.
The Advanced tab provides advanced settings for the Swivel server connection. You should normally only use this if you are having problems connecting.
SSL protocols: version 2.x appliances only use SSLv3 and TLS 1.0. However, if you have version 3 or 4 appliances, or are not using a Swivel appliance, and your Swivel server is using Java 7 or higher, you can try using higher versions of TLS. By default, all protocols are permitted. The connection will try all permitted protocols until it finds one that both ends support, so disabling SSL 3 and TLS 1.0 for a version 2 Swivel appliance will cause the connection to fail. However, enabling the older protocols can expose security vulnerabilities.
You can configure a web proxy to be used for the connection. By default, the Automatic option is selected, in which case the connection will use whichever proxy is configured for internet connections on the ADFS server. The other options are None, in which case no proxy is used, or Manual, in which case you can specify the URL of a proxy to use.
User Agent provides a custom user agent string to be sent with the request. You might want to alter this to try emulating a particular browser, if you have problems connecting.
Finally, you can specify other HTTP headers that will be sent with the request. Right click on the Headers list to add, delete or edit them.
Proxy Configuration
The proxy configuration program is a simplified version of the settings tab for the full configuration program.
Installing a Local Swivel Proxy
This is an optional enhancement to the login experience. It requires that IIS is installed on the ADFS server or proxy server. It provides links for TURing and Pinpad images local to the ADFS server, thereby avoiding the problems experienced when hosting the images on a different server.
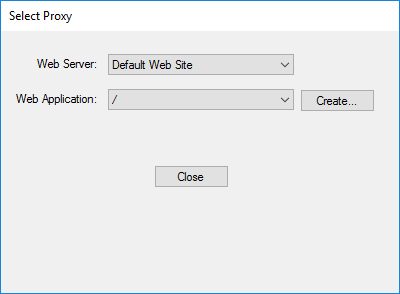
You can either access this from the main configuration program, so long as "Local Proxy" is selected, or you can use the menu option Swivel Authentication Provider Proxy Configuration. The following dialog is shown:
Select the existing web application you want to install the proxy under (typically this will be the root application), and click Create... to show the following
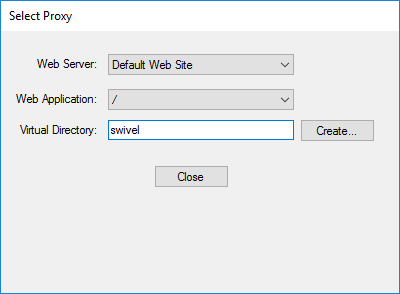
Enter the name of the directory you want to use for the proxy and click Create... again. This will create a web application with the given name, and automatically configure the required settings to use it. This application contains links for the TURing and Pinpad images.
An additional menu option is provided to remove the virtual directory. This should normally be done before uninstalling the authentication provider.
Using the Authentication Provider
Note that the installer simply makes the Swivel Authentication Provider available for use: it does not actually enforce its use. To do so, you need to modify an Authentication Policy:
From Administrative Tools, select AD FS Management,
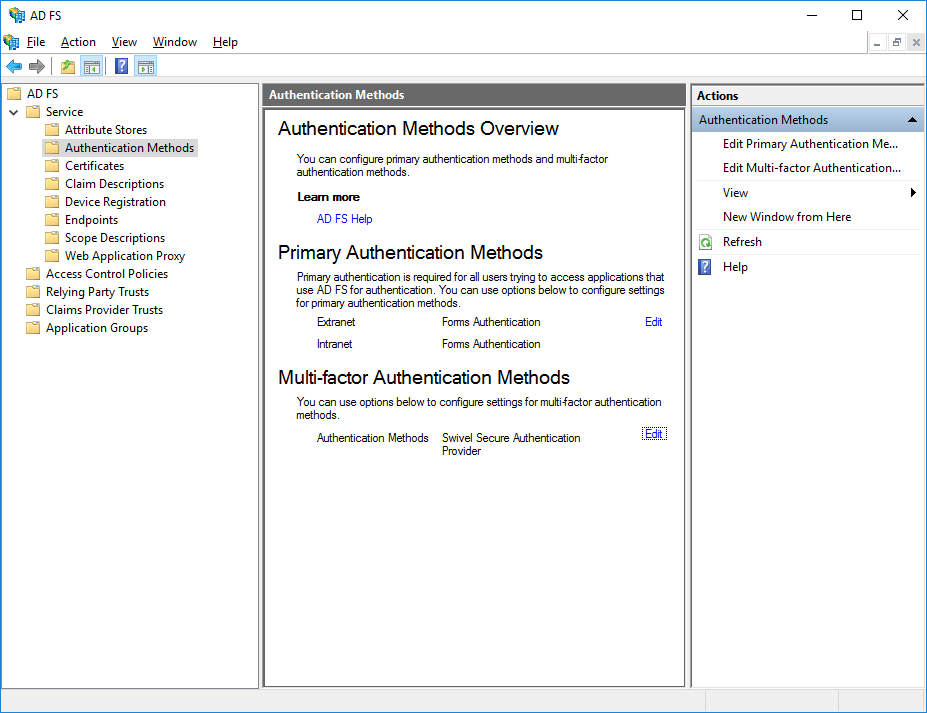
In ADFS 4.0, select Service, then Authentication Methods.
In ADFS 3.0, choose Authentication Policies.
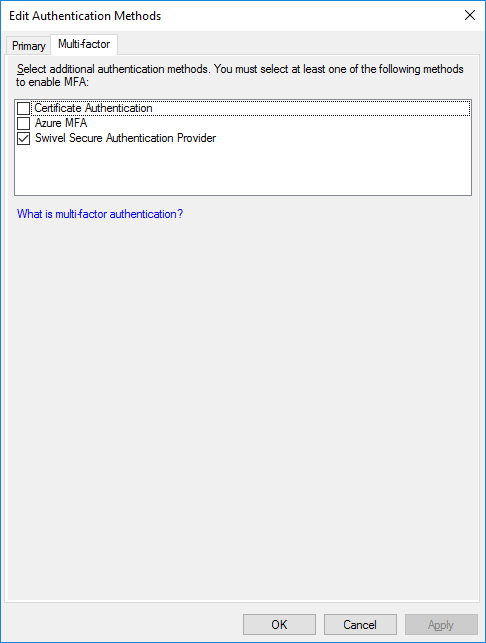
Under Multi-factor Authentication, click Edit.
In ADFS 3.0, this dialog looked different, but the principle is the same:
You should see Swivel Authentication Provider as an additional authentication method at the bottom of the dialog. Check this to enable it. You will also need to choose which users or groups are required to use MFA, and where they need to use it from. This document does not describe how to configure ADFS Authentication Policies - you should read the appropriate Microsoft documentation for that.
Note that if you have multiple ADFS Servers and/or ADFS Proxies you must install the Authentication Provider component every server. To use single-channel authentication, you must install the Proxy component on every proxy server. You do not need to install anything on the proxies if you are only using dual-channel authentication methods.
Once you have enabled MFA for the Swivel Authentication Provider, the next time you go to a page that requires ADFS authentication, after you enter your usual AD credentials successfully, you will be prompted to enter a Swivel one-time code.
Advanced Features
Requiring Swivel Authentication for Single Applications
NOTE: these instructions are relevant to any ADFS Multi-Factor Authentication provider, not just Swivel, so are subject to the facilities provided by Microsoft. The way authentication is configured has changed considerably in ADFS 4.0, so we provide two separate sets of instructions.
It may be that you want to enable Swivel Authentication in ADFS for some applications but not others. It is possible to manage this, with certain limitations, as described below.
ADFS 4.0
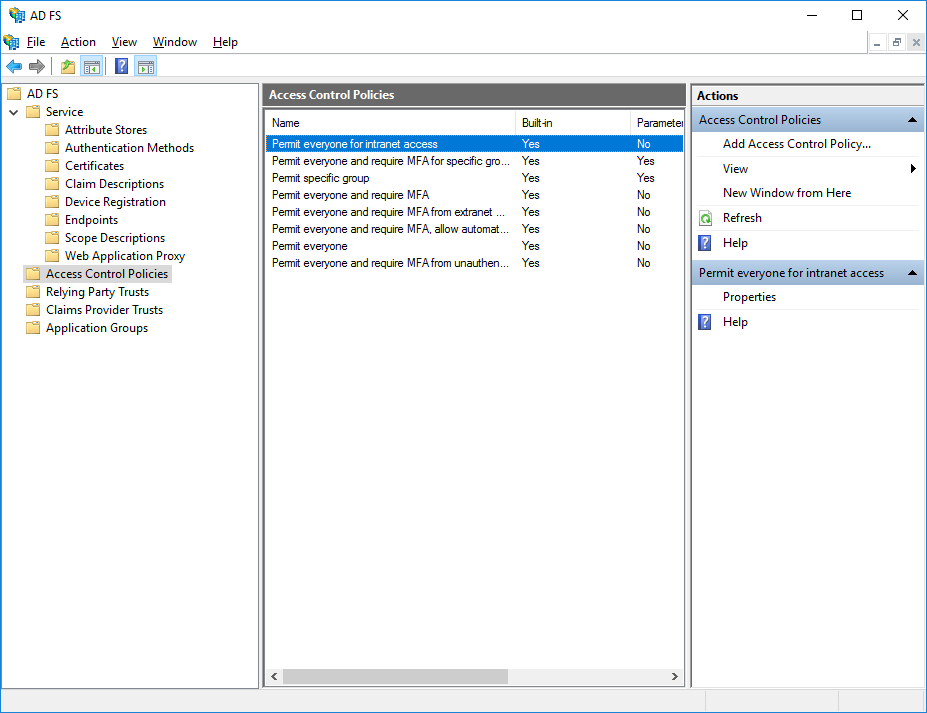
A number of built-in access control policies are provided. It is possible to define new policies, but the only important feature to enable Swivel authentication is that Multi-Factor Authentication is required.
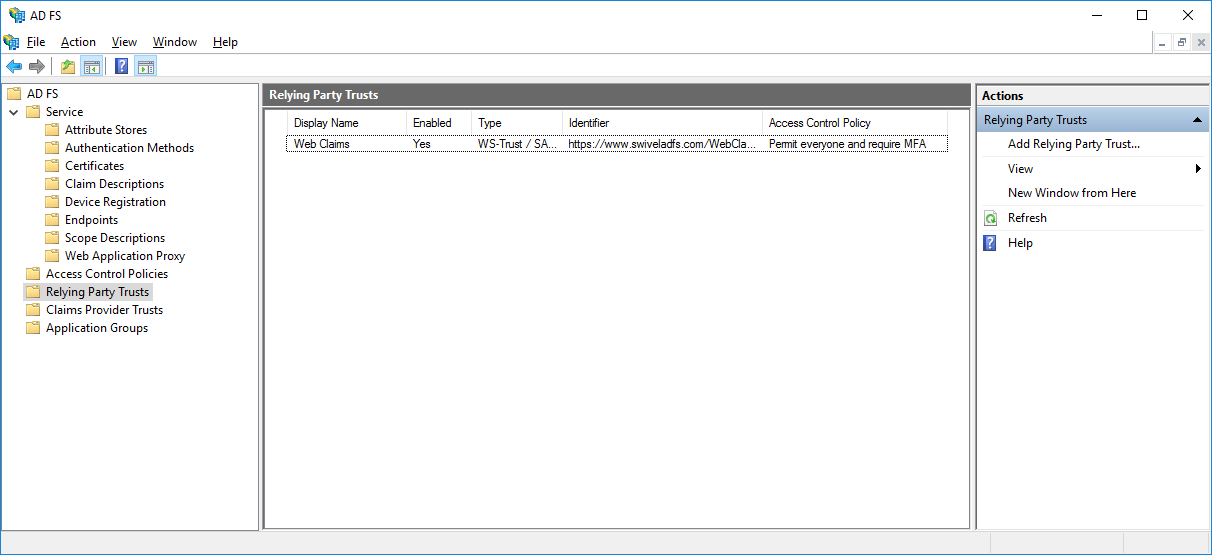
For each relying party, you can select an Access Control Policy from the list.
ADFS 3.0
Firstly, you must set up Global Multi-factor Authentication (MFA), and enable "Swivel Authentication Provider". However, DO NOT add any groups or check any devices or locations options. This will enable the Swivel authentication provider, but not require it for anything.
Secondly, got to Authentication Policies -> Per Relying Party Trust and select the relevant Trust (i.e. Application). Click Edit Custom Multi-factor Authentication for this application, and set the conditions under which you require MFA.
You will note that the MFA providers are not listed here. You can only enable or disable MFA: you can't specify which MFA provider to use. This is a limitation of ADFS, and not within Swivel's control. There are advanced methods to manage this, using claim rules, but this is beyond the scope of this article.
Customising the Login Page Look and Feel
It is possible to make minor adjustments to the Swivel login page. In order to do this, you must be familiar with Cascading Stylesheets (CSS).
The stylesheet used by the Swivel login page is stored under C:\ProgramData\Swivel Secure\Swivel ADFS Authentication Provider together with the provider configuration and logs. The file you need to modify is SwivelStyle.css. This is always delivered by the ADFS server, not the proxy. Also, you should restart the ADFS services after any changes you make. You can only make changes to existing styles within the CSS, as these are the only ones used. The style names should make it obvious what they affect.
Known Issues
Public Access to Swivel Server, Untrusted Certificates and TURing/Pinpad Images
As noted above, by default TURing images and Pinpad images are delivered directly from the Swivel server. This has two consequences:
- The Swivel Server must be published on the Internet
- If the Swivel server is running HTTPS, it must have a valid commercial SSL certificate
The best solution for this is to install the optional local proxy, but this requires IIS to be installed on the ADFS server, the ADFS proxy or a suitable alternative public server. Alternatively, you can proxy the image through a different public web server, but this has the same provisos as for delivering images directly from the Swivel appliance.
Problems Registering the Authentication Provider
Sometimes the authentication provider fails to register, usually because the installer didn't have the correct permissions. You can register it manually by opening Powershell as administrator, and entering the following command:
Register-AdfsAuthenticationProvider -Name SwivelAuthenticationProvider -TypeName "com.swivelsecure.authprovider.SwivelAuthProxy, SwivelAuthProvider, Version=1.2.1.0, Culture=Neutral, PublicKeyToken=ff4faaf85e9a3b66"
Check that Version in the above command is set to the version of the authentication provider you are installing.
Uninstalling the Authentication Provider
Before uninstalling the Swivel Authentication Provider, make sure that it is removed from ALL Authentication Policies. If you do not do this, you will not be able to reinstall or upgrade to a newer version. If you accidentally forget to remove the authentication provider before uninstalling, it will not be unregistered properly. Therefore, before you can reinstall or upgrade, after removing it from all policies, you will need to unregister manually, by running the following command from a PowerShell command prompt:
Unregister-AdfsAuthenticationProvider -Name SwivelAuthenticationProvider
Then restart the ADFS service.
The uninstallation procedure does not remove any local image proxy defined. Typically, you should uninstall this, using the menu shortcut provided, before uninstalling, but if you are uninstalling in order to install a newer version, this is not necessary.
Note that the uninstallation procedure requires that you unregister the authentication provider. In order to do this, a prompt will be displayed, and you will have to confirm that you want to unregister it (by pressing 'Y' and Enter). If you have not removed the Swivel authentication provider from the multi-factor authentication policies, this will fail - see above.
If you want to completely remove the Swivel Authentication Provider, you will also need to remove the folder C:\ProgramData\Swivel Secure\Swivel Authentication Provider. This contains the filter configuration and logs.
Upgrading
Currently, the filter installer does not permit direct upgrading from an earlier version, so it is necessary to uninstall the previous filter, including changing the ADFS authentication policy, before installing a new version. However, the configuration is retained (unless you deleted it as above), and will be automatically applied to the new version. You will still have to re-enable the ADFS authentication policy, though.
Troubleshooting
Check to see if a connection can be made from the ADFS server to the Swivel server, for an appliance: https://Swivel-URL:8080/pinsafe
