Citrix Web Interface 5.X additional login page options
Contents
Citrix Web Interface 5.x additional login page options
This outlines how to further customise the Citrix login page. This is a supplement to the Citrix Web Interface 5.x Integration guides.
Removing the Single Channel Button
To remove the refresh image, delete the following text:
 "<a class='leftDoor' href='javascript:onTuringButtonClick();'>" +
                                 "Refresh Image" +
                                 "</a>
Replacing the Single Channel Button with a Dual Channel Button
Replacing TURing image with a Dual Channel (SMS) request
Edit the file pinsafe_image.aspx
find the following line:
url.AppendFormat("{0}:{1}/{2}/SCImage?username={3}", server, port, context, Request.QueryString["username"]);
Replace with:
url.AppendFormat("{0}:{1}/{2}/DCImage?username={3}", server, port, context, Request.QueryString["username"]);
Compatibility
This has been tested on Citrix Web Interface 5.1
Dual Channel Button modification
On the Swivel Administration console under Server/Dual Channel, ensure Allow message request by username: is set to Yes.
On the Citrix Web Interface Installation create a copy of auth/pinsafe_image.aspx, and call it pinsafe_message.aspx
You will also need to ensure that pinsafe_message.aspx is included in the list of unprotected pages.
In auth/clientscripts/login.js, make a copy of the function onTuringButtonClick(), calling it onMessageButtonClick (). Change image.src in this function to point to pinsafe_message.aspx.
Edit app_data/include/loginMainForm.inc. Locate the text '<div class="otcButtonPane"'. Copy from here up to the ending </div>, and paste it immediately after this div. Change "href=javascript:onTuringButtonClick" to "href=onMessageButtonClick".
Change the title and id of this div, as well as the id of the enclosed img and span elements. The new div element should be something like this:
     <div class="otcButtonPane"><a
            href="javascript:onMessageButtonClick()" title="Click this button to retrieve a PinSafe message."
            onmouseover="changeOtcBtnColor(true);" onmouseout="changeOtcBtnColor(false);"
            onfocus="changeOtcBtnColor(true);" onblur="changeOtcBtnColor(false);"
            tabIndex="<%=Constants.TAB_INDEX_FORM%>"
            id="dcmessage"
            name="dcmessage"
         ><img id="msgButtonBg" src="../media/LoginButtonGlow.gif" alt="" /><span id="msgButtonWrapper">Get Message</span></a></div>
To make sure the new button looks right, you will also need to edit app_data/include/loginStyle.inc. Look for occurrences of #otcButtonWrapper and add ", #msgButtonWrapper". Also, for the entry #<%=Constants.ID_OTC_BTN%>, add ", #dcmessage".
To change the Refresh Image button modify the file under auth\clientscripts\login.js.add and search for the line Refresh Image and change to the required text, such as Request Code or Request SMS.
"<span class='rightDoor'>Refresh Image</span>" +"
Dual Channel Testing
Test the button from the login page. Check the Swivel logs for the dual channel requests.
Single Channel Button with an automated Single Channel Image
The Citrix Web Interface 5.x integration has a button to generate the Single Channel Image. This can be modified to automatically show the Turing image without the need for pressing the button when the user enters into the required field.
Compatibility
This has been tested on Citrix Web Interface 5.1 using the Single Channel Turing Image
Single Channel Button to automated Single Channel Image modification
Edit the loginMainForm.inc file on the Citrix server. Locate the username field - look for the following:
<input type='text' name='<%=Constants.ID_USER%>' ...
insert the following line after that one:
onblur='onTuringButtonClick()'
This causes the turing image JavaScript function to be called when the user leaves the username field.
Automated Single Channel Image Testing
Test the image from the login page. Check the Swivel logs for the single channel image requests.
Turing, Dual channel and Display Index buttons
The Citrix Web Interface 5.x integration has a button to generate the Single Channel Image. This can be modified to add additional buttons of Show Turing Image, Send Dual Channel Security String and Display Index number. See also Multiple Security Strings How To Guide
Compatibility
This has been tested on Citrix Web Interface 5.3
Required Files
The following files are required and should be used for installation: [1]
Installation Instructions
Follow the installation instructions for the relevant Citrix version.
Testing
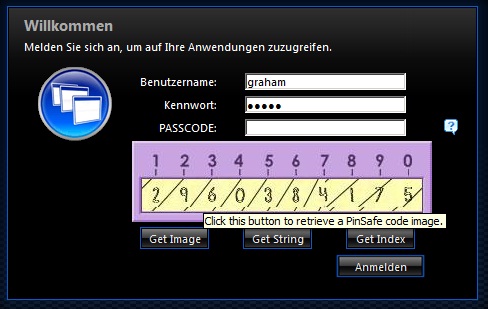
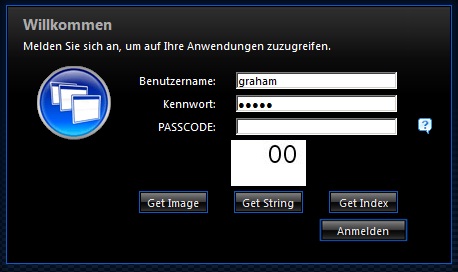
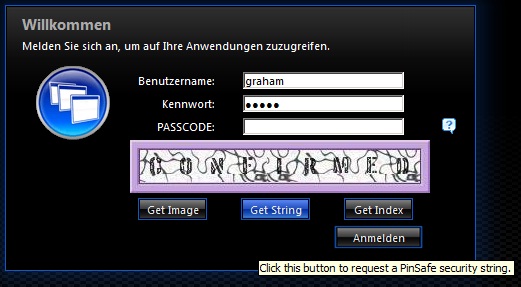
Verify that three buttons are displayed and that they show the expected results when selected.
The following screen shots show the different buttons in use
Single Channel TURing Image request
Multiple Security String Message index number telling user which security string to use for authentication
Securiy String On Demand Confirmation message of sending the user a Security String


