WinSCP How To Guide
Contents
Introduction
There are various applications which will provide SSH and SFTP functionality. We recommend the use of WinSCP for SFTP file transfers to and from the PINsafe appliance. If you wish to access the CMI console via SSH, please see the PuTTY How To Guide, WinSCP allows Putty to be started through the WinSCP interface for saved servers. WinSCP also allows files to be edited, and here Notepad or Notepad++ should be used but not WordPad as this may introduce Windows Control codes which can cause problems.
WinSCP can also be used to copy backups off of the appliance, see Automated SCP Backups.
Connecting to the PINsafe appliance
When you run WinSCP, you are presented with the following screen, where you can manage stored sessions. To connect to the PINsafe appliance click the 'New' button on the right-hand side.
- Enter the IP address of the PINsafe appliance into the Host Name field (the default out of the box IP address is 192.168.0.35);
- Enter the username into the User Name field (the default username is admin);
- Enter the password into the Password field (the default password is lockbox);
Click the Login button at the bottom of the window, to initiate the SFTP session. You may be prompted to add or update the security key.
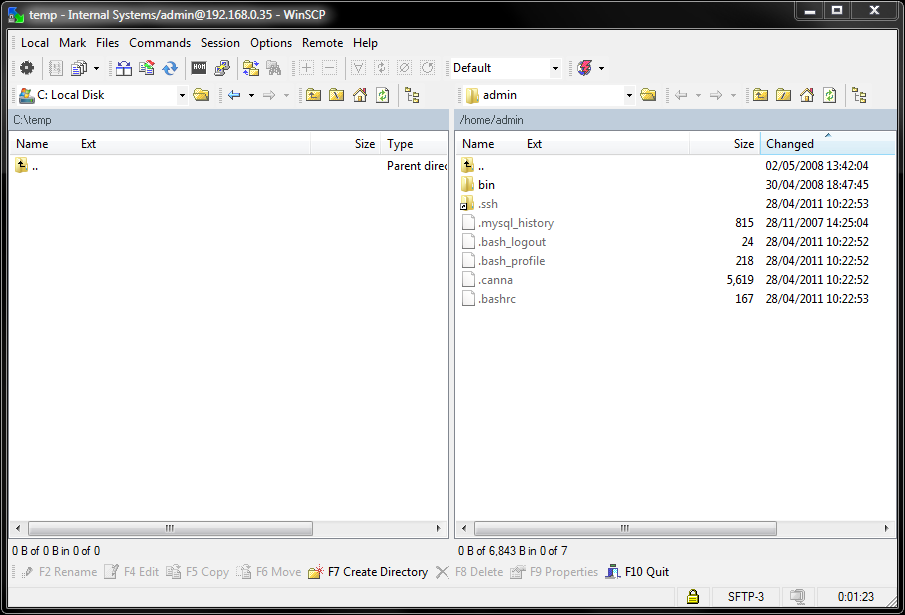
You should then be presented with the following screen, where you have a left-hand pane and right-hand pane representing your local filesystem and remote (PINsafe) filesystem. You can now drag and drop files between your local filesystem and the remote filesystem.
Folders and files that start with a '.' are hiden from view, and to allow these to be seen, select Options/Preferences then Panels and check the option to show hidden files (Ctrl+Alt+H)
Troubleshooting
- Check that the IP address is the correct IP for the appliance;
- Check that internal firewall policies allow connection to port 22.


