Citrix Netscaler RADIUS Monitor and RADIUS Load Balancer
Contents
[hide]- 1 Introduction
- 2 Prerequisites
- 3 Baseline
- 4 Swivel Configuration
- 5 Netscaler Configuration
- 6 Testing
- 7 Known Issues
- 8 Troubleshooting
Introduction
Citrix 10.5 allows the RADIUS to be monitored and load balanced in a number of ways. Earlier versions such as 10.1 also have this capability but have different configuration screens.
Where Swivel Single Channel Sessions (TURing, Pinpad), and SMS by On Demand Authentication and Mobile Provision Codes, it is expected that Appliance Synchronisation will also be used.
Prerequisites
Swivel HA solution
Netscaler 10.x
Baseline
Swivel 3.10.3
Netscaler 10.5
Swivel Configuration
The Swivel servers should be setup as indicated in the integration guide.
Configure a RADIUS NAS entry for the Netscaler SNIP interface, see RADIUS Configuration
Optionally set Authenticate non-user with just password: to Yes and configure a non Swivel user with a static password, see RADIUS Static Password.
Netscaler Configuration
The Netscaler Configuration should be setup and tested to be working before attempting these steps.
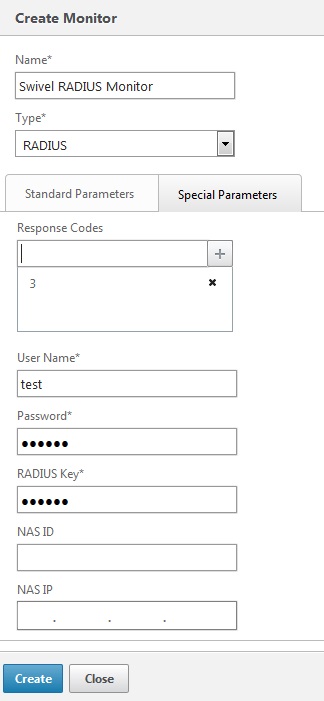
Create a Swivel Radius Monitor
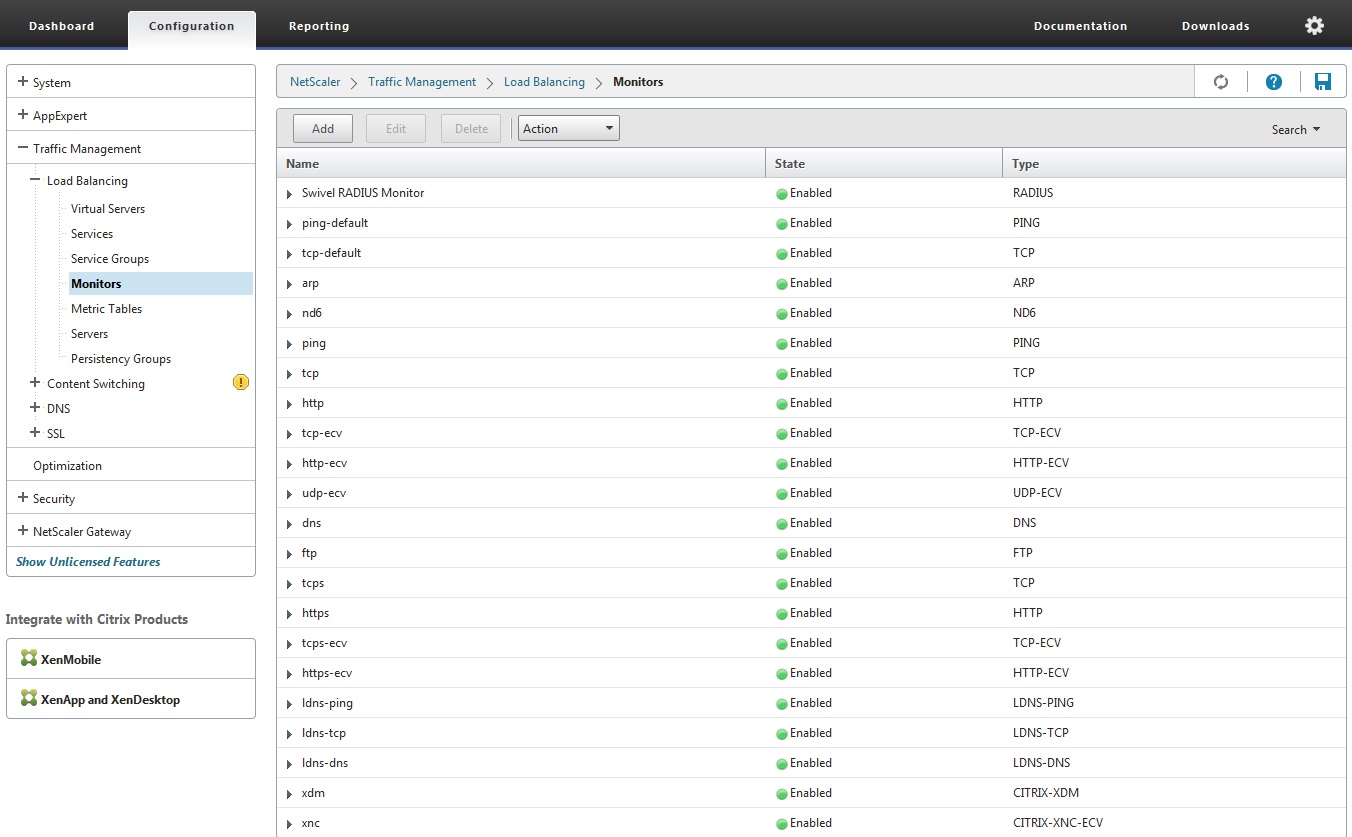
On the Netscaler Administration console Configutration Tab select Traffic management/Load Balancing/Monitors, then Add
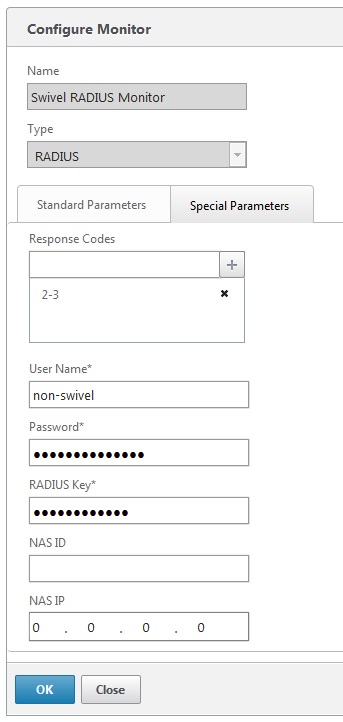
Expand the Special Parameters and add Response Codes to 3 for Access Reject and add 2 for Access Accept
Set Username to an appropriate test user
Set Password to the required value if Authenticate non-user with just password if authenticate non Swivel user is used (or random if not)
Set RADIUS Key to the value for the Swivel RADIUS NAS
Leave other settings as default
Click Create to create the Monitor
The Monitor should appear in the list.
Create Entries for the Swivel RADIUS Servers
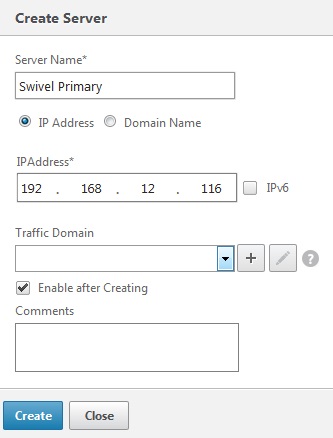
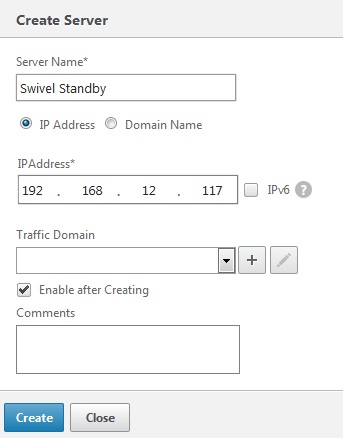
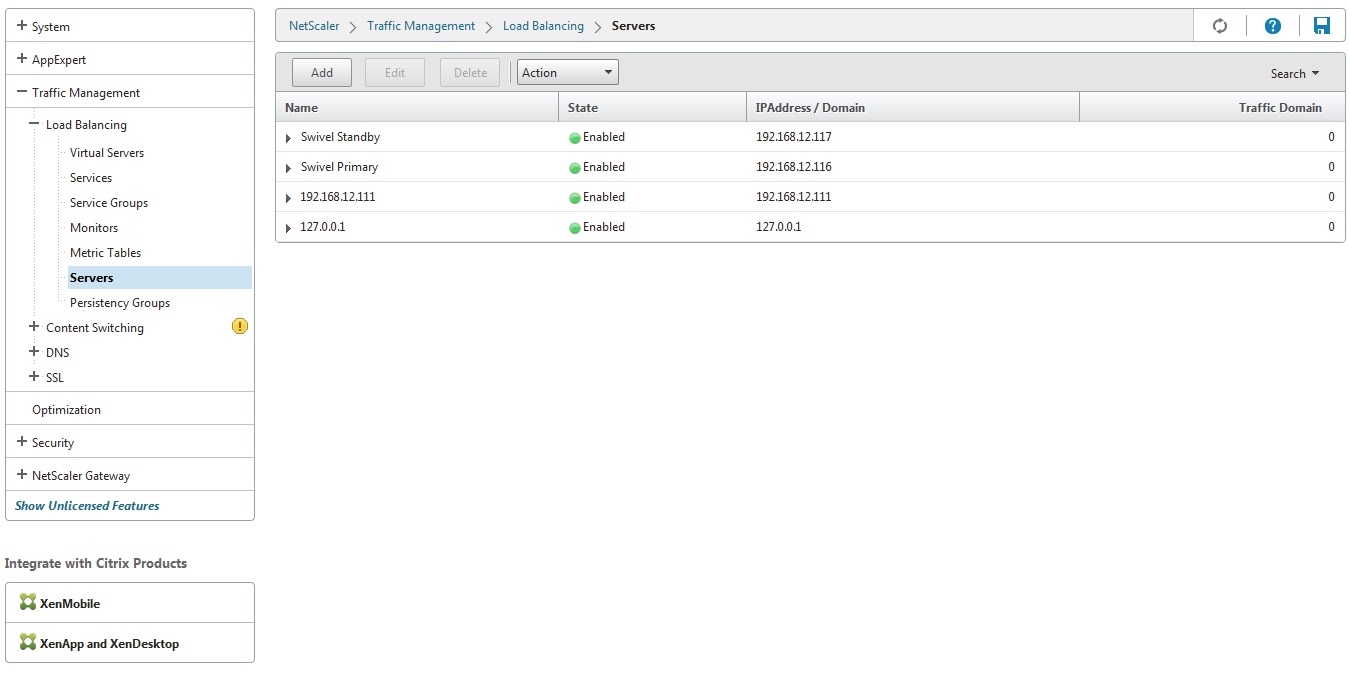
On the Netscaler Administration console Configutration Tab select Traffic management/Load Balancing/Servers, then Add. Enter the details for each of the Swivel RADIUS servers. If the Swivel servers are already configured, then this step can be skipped over.
Enter Server Name' and IP Address/Hostname
Click Create to create the Server
Create a Swivel Load Balance Service Group
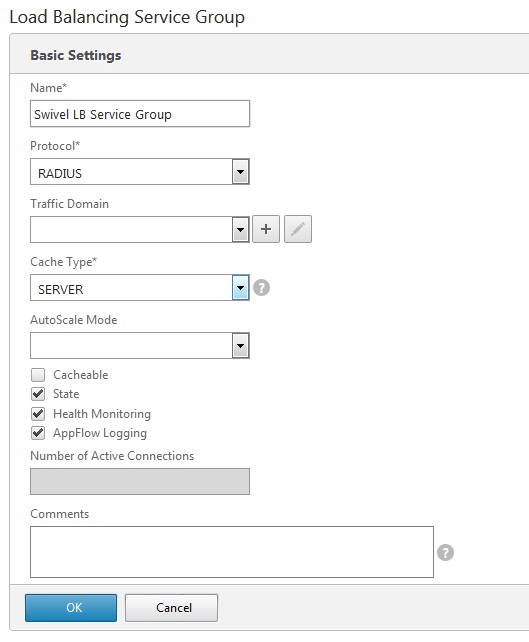
On the Netscaler Administration console Configutration Tab select Traffic management/Load Balancing/Service Group, then Add.
Enter the Name, Protocol RADIUS, then click OK, and
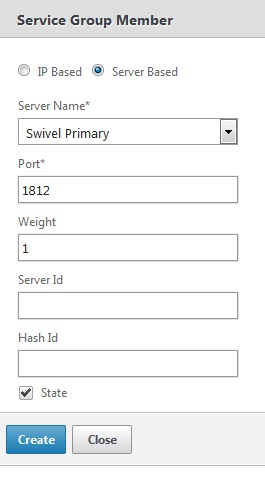
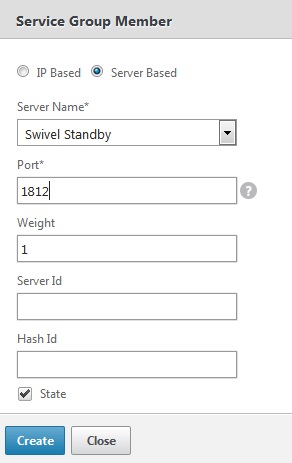
Click below the Service Group members to add members to the group, select the Server Based radio button to add in the Swivel RADIUS servers and enter Port 1812. Repeat for each Swivel server to be added.
Add the Monitor to the Load Balance Server Group
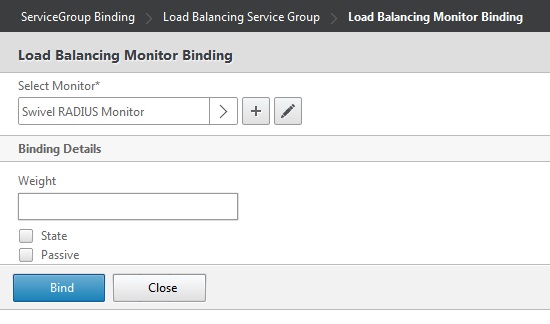
From the Right Handside select Monitor so it appears at the bottom then click it again to add the Swivel RADIUS Monitor.
Click Bind to add it, then Done.
Create A Virtual Server
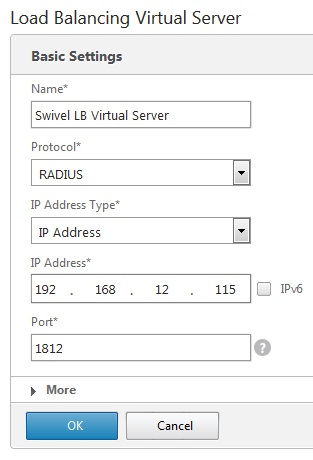
On the Netscaler Administration console Configutration Tab select Traffic management/Load Balancing/Virtual Servers, then Add. Enter a Name for the Virtual Server IP Address, Protocol and Port.
Click OK to create the entry
Add the Service Group to the Virtual Server
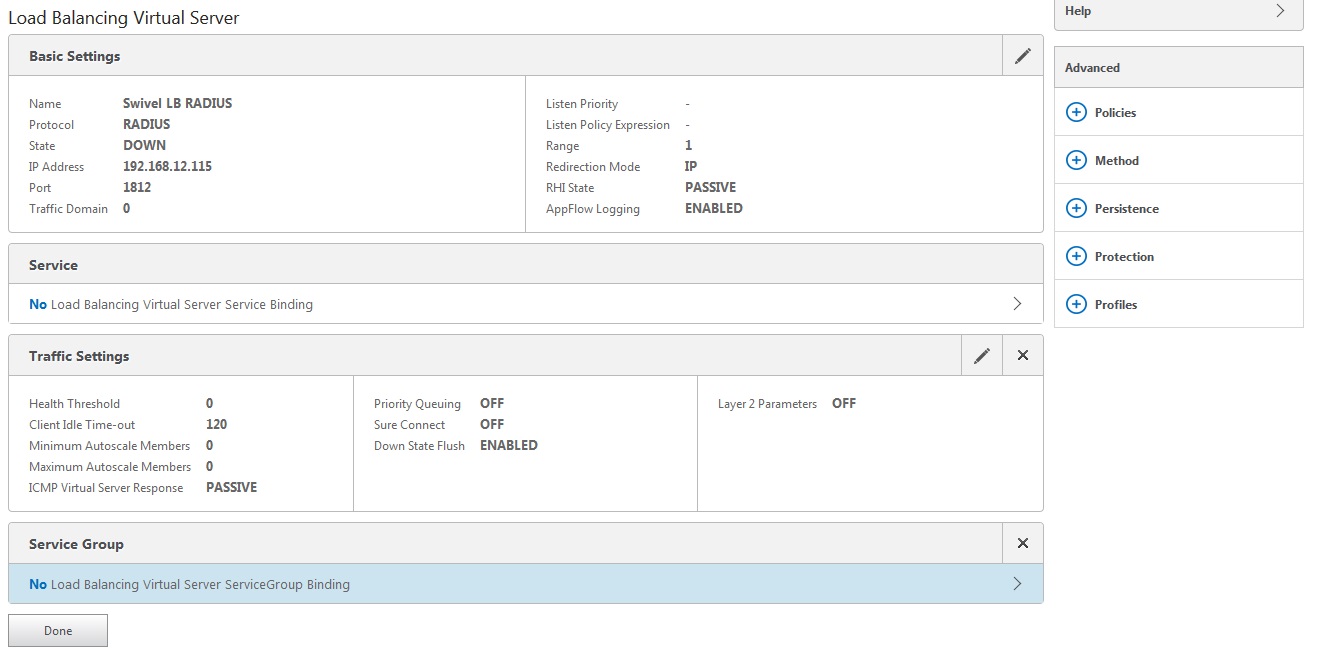
After configuring the Virtual Server, the Service section will appear, click on OK to bring up the Service Group on the right hand side.
Click on the Service Group, it will appear at the bottom allowing it to be seleceted, and then click on Select Service Group Name to choose the required service group created earlier.
Then click Bind
Add the Method to the Virtual Server
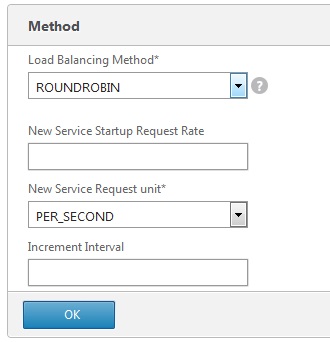
Select Method and then from the Load Balancing Method drop down select ROUNDROBIN then click on OK.
Click Done and the Virtual server should be created.
Netscaler RADIUS configuration
The Netscaler can now be configured to use the new Virtual Server as its RADIUS servers following the original documentation.
Testing
When functioing RADIUS entries will be seen in the Swivel RADIUS logs for each test.
Try RADIUS authentications and see which Swivel server that recieves them. Stopping one RADIUS server should indicate on the Virtual Servers that health is degraded, i.e. 50% for two servers.
Known Issues
The load balancing can produce a large number of logs.
