PositiveID How to Guide
Contents
[hide]- 1 PositiveID
- 1.1 Overview
- 1.2 Prerequisites
- 1.3 PositiveID Configuration
- 1.3.1 Allow session request by username
- 1.3.2 Create a Positive ID Group
- 1.3.3 Create transports for PositiveID group
- 1.3.4 Assign PositiveID Authentication to User Group
- 1.3.5 Configure PositiveID Session Management
- 1.3.6 Configure PositiveID Device Policy
- 1.3.7 Provision PositiveID Registration Keys
- 1.4 Provision a Device
- 1.5 Testing
- 1.6 Known Issues and Limitations
- 1.7 Troubleshooting
PositiveID
Positive ID is no longer developed and is no longer available for purchase.
Overview
Positive ID fingerprints a desktop, laptop or server to uniquely identify the device. A PositiveID user is required to authenticate using one of their devices. A PositiveID user who is not registered to a device will not be able to authenticate using that device using Single or dual channel. A user who is not a PositiveID user will be able to authenticate using a device that is registered to PositiveID user. A PC may be registered for access by several PositiveID users.
Prerequisites
PINsafe 3.x
PINsafe 3.7 requires a patch available here PINsafe PositiveID Server Patch
PINsafe Taskbar see Taskbar How to Guide
PositiveID Configuration
Allow session request by username
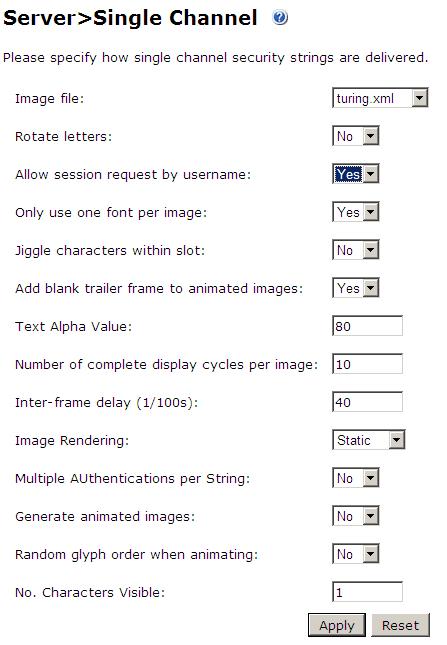
If the Single Channel Image request is to be used allow username to be used for authentication requests.
1. On the PINsafe Management Console select Server/Single Channel
2. Ensure ‘Allow session request by username’ is set to YES
Create a Positive ID Group
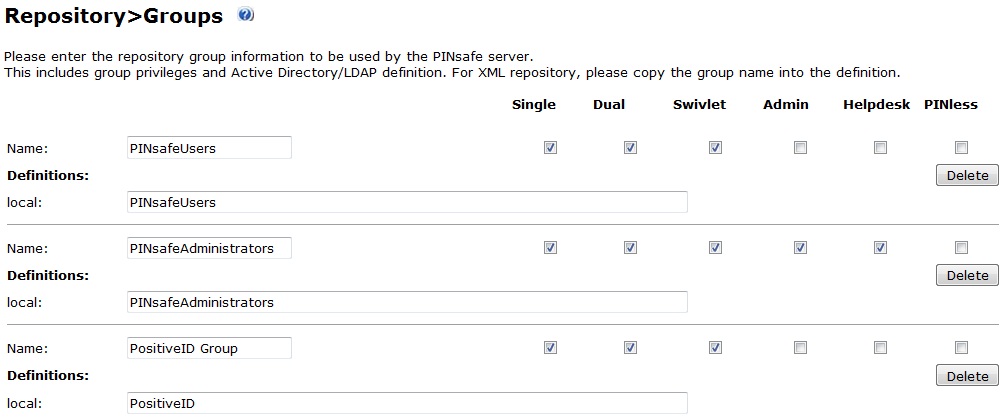
Create a group of users for which PositiveID authentication will be required. If a group of users already exists for which PositiveID is required, then skip to the next step.
Note on a Active Active setup the user data is transferred in the database, but in order to see the groups, the Positive ID group needs to be created on all PINsafe instances.
1. On the PINsafe Administration Console select Repository/Groups
2. Create a PositiveID Group
3. Assign Single, Dual, Swivlet (PINless?) permissions as appropriate
4. Add additional data sources for users as required
5. When complete click Apply to save the settings
Note: Do not synchronise the users at this stage from the data source.
Create transports for PositiveID group
Create the transports for the users, If the transports are already configured for the groups which PositiveID is required, then skip to the next step.
1. On the PINsafe Administration Console select Transport/General
2. Assign select the transport for the PositiveID Group of users by using the drop down menu to select the PositiveID group for the transport required. For further information on transports see Transport Configuration
3. When complete click Apply to save the settings
4. Select the new transport created under Transport and enter required configuration information.
Assign PositiveID Authentication to User Group
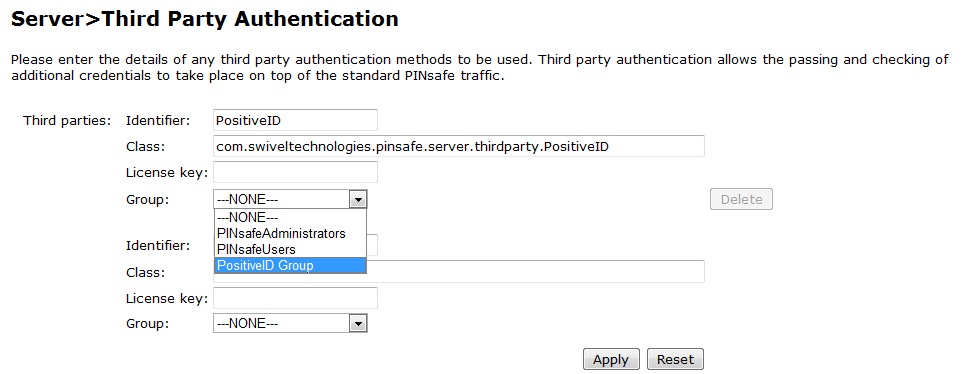
1. On the PINsafe Administration Console select Server/Third Party Integration
2. Assign the Group of users who will use Positive ID (A 5 user evaluation license is automatically used)
3. When complete click Apply to save the settings. A PositiveID menu item should now appear
Configure PositiveID Session Management
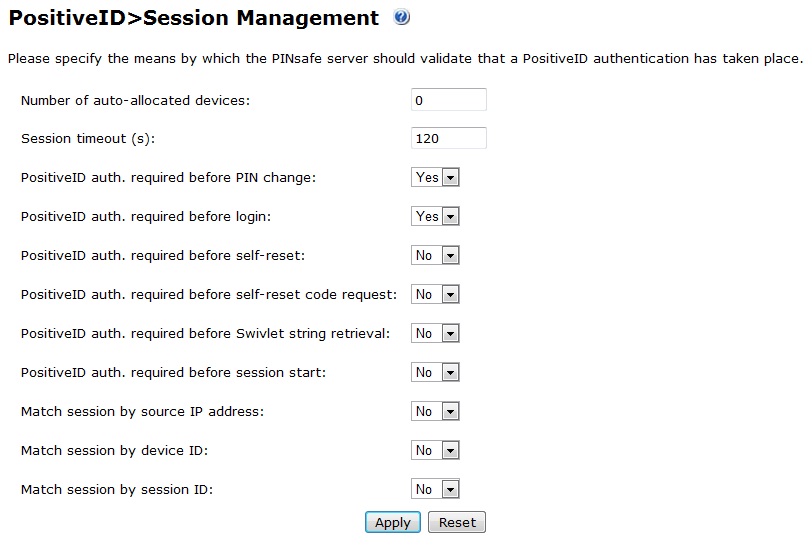
The Session management details when a Positive ID authentication should occur.
1. On the PINsafe Administration Console select PositiveID/Session Management
2. Select the appropriate settings
3. When complete click Apply to save the settings
The possible options for the settings are listed below:
Number of auto-allocated devices: Default: 0, Options 1,2,3..., This allows a user to be automatically sent one or more Registration Keys when the account is created. A value of 0 means that no Registration Keys are sent. This is particularly useful when provisioning large numbers of users.
Session timeout: (seconds) Default: 120, The maximum time that PositiveID authentication can occur before PINsafe considers it to be invalid.
PositiveID auth. required before PIN change: Default: Yes, Options Yes/No, When enabled requires a successful PositiveID authentication before a ChangePIN change is permitted.
PositiveID auth. required before login: Default: Yes, Options Yes/No, When enabled requires a successful PositiveID authentication before the PositiveID user can login
PositiveID auth. required before self-reset: Default: No, Options Yes/No, When enabled requires a successful PositiveID authentication before a Self Reset is permitted.
PositiveID auth. required before self-reset code request: Default: No, Options Yes/No, When enabled requires a successful PositiveID authentication before a Self Reset code is sent to the user.
PositiveID auth. required before Swivlet string retrieval: Default: No, Options Yes/No, When enabled requires a successful PositiveID authentication before security strings can be downloaded by the mobile phone application see IPhone, Swivlet Java Applet, Windows Mobile.
PositiveID auth. required before session start: Default: No, Options Yes/No, Requires a successful PositiveID authentication before a single channel session can be started.
Match session by source IP address: Default: No, Options Yes/No, When enabled the server checks that the request for PINsafe authentication is coming from the same IP address as PositiveID authentication. If the IP addresses don't match, or can't be determined, the authentication will fail.
Match session by device ID: Default: No, Options Yes/No, When enabled the PINsafe agent must pass, as part of the AgentXML traffic, the identifier of the PositiveID device that has been previously authenticated.
Match session by session ID: Default: No, Options Yes/No, When enabled the PINsafe agent must pass, as part of the AgentXML traffic, the session identifier returned by the PositiveID client after authentication.
Configure PositiveID Device Policy
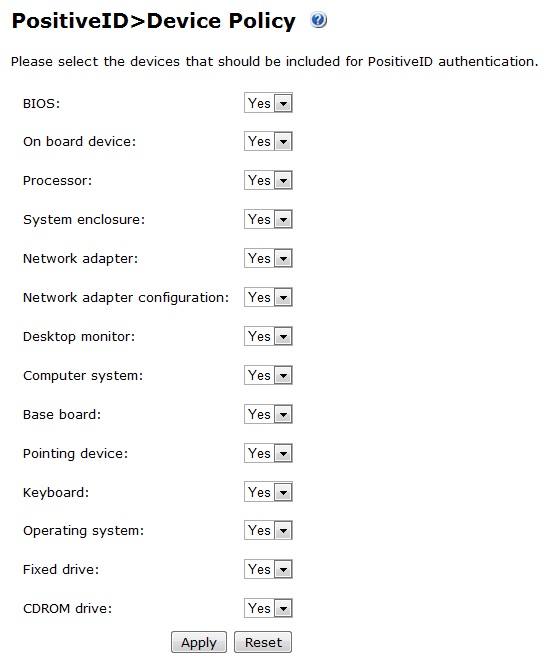
The settings in this group determine which devices are checked for equality when PositiveID authentication takes place. If any device is disabled, changes of that device on the client will not cause PositiveID authentication to fail.
1. On the PINsafe Administration Console select PositiveID/Device Policy
2. Select the appropriate settings
3. When complete click Apply to save the settings
The possible group options are:
BIOS: Default: Yes, Options Yes/No
On board device: Default: Yes, Options Yes/No
Processor: Default: Yes, Options Yes/No
System enclosure: Default: Yes, Options Yes/No
Network adapter: Default: Yes, Options Yes/No
Network adapter configuration: Default: Yes, Options Yes/No
Desktop monitor: Default: Yes, Options Yes/No
Computer system: Default: Yes, Options Yes/No
Base board: Default: Yes, Options Yes/No
Pointing device: Default: Yes, Options Yes/No
Keyboard: Default: Yes, Options Yes/No
Operating system: Default: Yes, Options Yes/No
Fixed drive: Default: Yes, Options Yes/No
CDROM drive: Default: Yes, Options Yes/No
FAQ: Q). Does PINsafe read a machines certificate to uniquely verify the device?
A). No PositiveID does not use certificates for identification.
Provision PositiveID Registration Keys
If the auto provision Number of auto-allocated devices: is set to a value greater than 0 then the user will automatically receive a Registration Key. They can also be manually provisioned a Registration Key.
1. On the PINsafe Administration Console select User Administration
2. Synchronise users from the required Positive ID group by clicking on User Sync for that group. Check the logs to see if any automated Registration Keys are sent out, the following message can be seen: New PositiveID device automatically allocated, username: Graham, id: 9
3. left click on user name then PID. If it is greyed out then they are not part of a PositiveID group
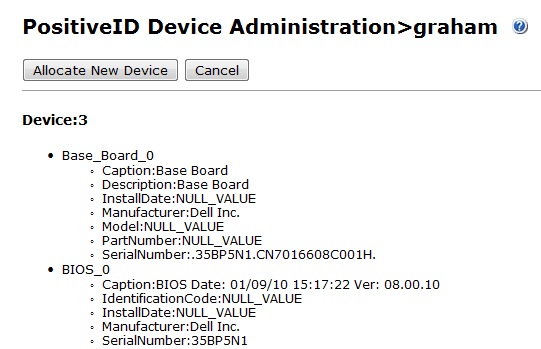
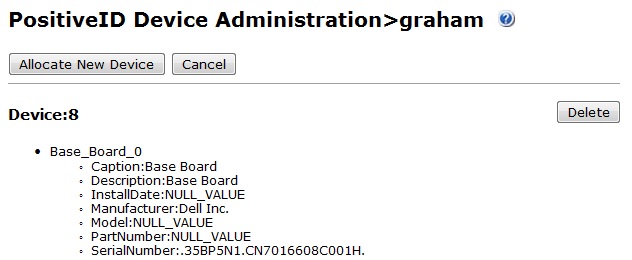
4. If a Registration Key has been automatically allocated it will appear here for the user. To manually create a Registration Keys click on Allocate New Device, a new Registration Key then should appear below. Check logs to ensure Registration Key has been sent to user by their transport.
No Registration Keys
Unregistered Registration Key
Registered Device
Provision a Device
On the device which is to be provisioned follow the instructions for installing and using the PINsafe Taskbar, see Taskbar How to Guide Ensure that the required authentication method is tested and available, for example the Turing image. Additional steps for Positive ID authentication are listed below.
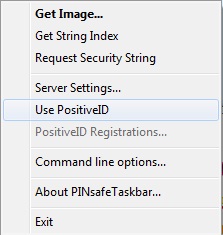
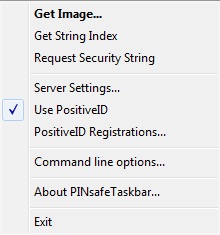
Enable PositiveID Authentication on the Taskbar
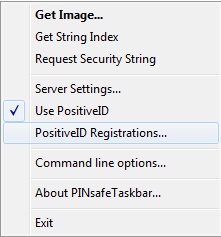
Right click on the PINsafe Taskbar and click on the line Use PositiveID, ensure a tick appears next to the menu item.
Enter Registration Key
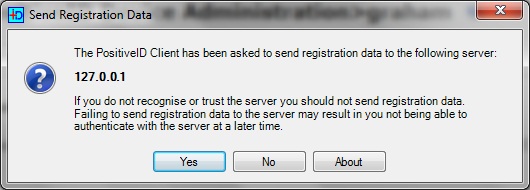
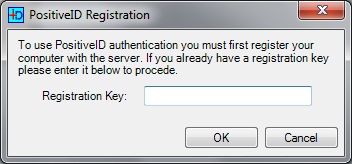
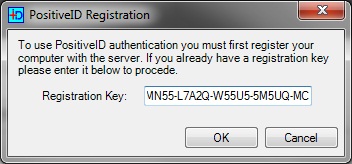
From the PINsafe Taskbar click on Get Image, a box will appear confirming the IP or hostname of the PINsafe server, if correct click Yes and when prompted enter the Registration Key sent. If the registration completes then a Turing Image should appear. The PINsafe log should say: PositiveID: Registration successful for device n. where n is the device number registered. If it fails check the error message.
PINsafe Positive ID send Registration information confirmation
PositiveID Registration Key
PositiveID Registration Key entered
Deleting a Registered Device on the PINsafe Administration Console
1. On the PINsafe Administration Console select User Administration then left click the required username, click on PID for that user.
2. Locate the Registered device to be removed then click on Delete. The device should be removed and the PINsafe log will record the following message: PositiveID device deleted, username: username, id: n
Deleting a Registered Device local PC
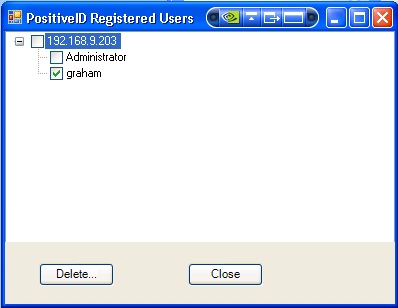
1. Right click on the Taskbar and select PositiveID Registrations.
2. Select or expand the PINsafe server with which the device is registered and then select the users from which PositiveID registered devices are to be removed.
3. Click on Delete to complete the removal.
Testing
Try to authenticate the user with PositiveID authentication enabled. The user should be able to authenticate. The PINsafe log should have the following: PositiveID: Authentication successful for device n
Try to authenticate the user with PositiveID authentication disabled in the Taskbar, the authentication should fail.
Known Issues and Limitations
The current PINsafe PositiveID does not function with the Windows GINA or Windows Credential provider at login time, but may provide authentication after login to Windows. If this feature is required please contact support.
The current PINsafe PositiveID will not function with the Swivlet/Mobile Phone Client.
Troubleshooting
PID button is not present
PINsafe patch may not have been applied.
PID button is greyed out and not selectable
PositiveID may not be enabled for that user.
Admin user is a PositiveID User and cannot login
If admins users are created as PositiveID users and cannot login to the Administration console, it is possible to disable the PositiveID authentication.
1). Stop Tomcat
2). Edit the file <path to PINsafe>/webapps/pinsafe/WEB-INF/conf/config.xml and locate the following section.
 <string name="class" readonly="true">
           <value>com.swiveltechnologies.pinsafe.server.thirdparty.PositiveID</value>
         </string>
         <choice name="group">
           <option displayValue="repository_groups_no_group">-</option>
           <option generated="true">PINsafeAdministrators</option>
           <option generated="true">PINsafeUsers</option>
           <option generated="true" selected="true">PositiveID</option>
         </choice>
3). Remove the line (Where PositiveID is the name of the group of PositiveID users).
<option generated="true" selected="true">PositiveID</option>
4). Save the file
5). Start Tomcat
6). Login
If you still cannot login then see: Administration login
Error Messages
Authentication failed, error: PID_ERROR_DEVICE_NOT_REGISTERED.
An attempt was made by a PositiveID user to authenticate from a device that they were not permitted to authenticate from. If the user should be authenticating correctly, ensure that the device is registered. This error message can also occur if the registered device is removed and the user is trying to register the device again with a new registration key, but the device is already registered to them. See PositiveID How to Guide#Deleting a Registered Device local PC
Registration of your computer with the PositiveID Server failed. Please see the error below for more details. Error: No Registration Key.
No registration key was entered during registration of the device
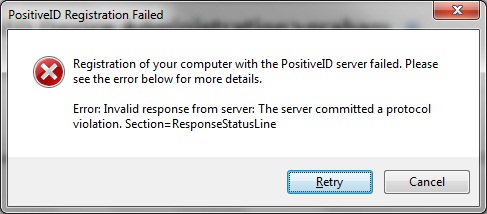
Registration of your computer with the PositiveID Server failed. Please see the error below for more details. Error: Invalid response from the server. The server committed a protocol violation. Scetion=ResponseStatusLine
Check the protocol being used is correct in the Taskbar, and if using https, if a self signed certificate s being used.
Registration of your computer with the PositiveID Server failed. Please see the error below for more details. Error: Invalid response from the server. The remote server returned an error:(404) Not Found
The PINsafe server has reached a web page that has returned a 404 error, Ensure PINsafe server is available, and that the hostname or IP address and port is correct, or if it is using SSL.
Registration of your computer with the PositiveID Server failed. Please see the error below for more details. Error: User Cancelled registration
The user registering the device cancelled the PositiveID registration process.
Registration of your computer with the PositiveID Server failed. Please see the error below for more details. Error: Registration failed.
This can occur if the PositiveID Taskbar cannot contact the PINsafe server such as if the PINsafe server is not available or the IP address is incorrect. This can also occur if the Registration key is incorrect and will give the following message in the PINsafe log: PositiveID: Registration failed for device, error: No such device. Also if a user has previously registered on that PC they may need to clear out their previous registration, see PositiveID_How_to_Guide#Deleting_a_Registered_Device_local_PC
PositiveID: Registration failed for device, error: No such device.
The PositiveID Registration key was not valid or has been deleted on the PINsafe server before the device could be registered.
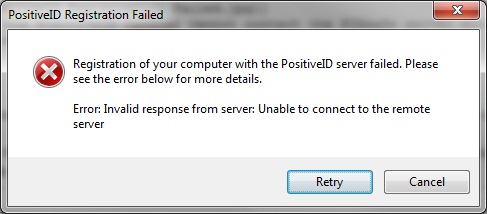
Registration of your computer with the PositiveID Server failed. Please see the error below for more details. Error: Invalid response from the server: Unable to connect to the remote server
The PositiveID registration has received an invalid response, check the IP, Hostname, Port, SSL communications are correct
INFO RADIUS: <5> Access-Request(1) LEN=65 192.168.1.1:25292 Access-Request by graham Failed: AccessRejectException: AGENT_ERROR_THIRDPARTY
INFO 192.168.1.1 VPN:Login failed for user: graham, error: Third party authentication failed.
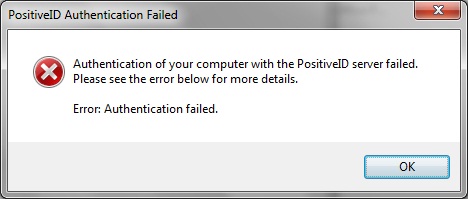
A Third party authentication such as PositiveID, has failed for the PINsafe user.
