Difference between revisions of "Barracuda SSL VPN Integration"
m (1 revision imported) |
|
(No difference)
| |
Latest revision as of 12:52, 11 May 2017
Contents
- 1 Introduction
- 2 Prerequisites
- 3 Baseline
- 4 Architecture
- 5 Swivel Configuration
- 6 Barracuda SSL VPN Configuration
- 7 Testing
- 8 Troubleshooting
- 9 Known Issues and Limitations
- 10 Additional Information
Introduction
This document describes steps to configure a Barracuda SSL VPN with Swivel as the authentication server.
Swivel can provide Two Factor authentication with SMS, Token, Mobile Phone Client and strong Single Channel Authentication TURing, Pinpad or in the Taskbar using RADIUS.
To use the Single Channel Image such as the TURing Image, the Swivel server must be made accessible. The client requests the images from the Swivel server, and is usually configured using a NAT (Network Address Translation), often with a proxy server. The Swivel appliance is configured with a proxy port to allow an additional layer of protection.
Prerequisites
Barracuada SSL VPN 380 or higher. Note the SSL VPN 280 does not support RADIUS authentication.
Barracuda Documentation
Swivel 3.x, 3.5 for RADIUS groups
The Swivel server must be accessible from the Barracuda SSL VPN using RADIUS.
The Swivel server must be accessible by client when using Single Channel Images, such as the Turing Image, and security string number, for external access this is usually through a NAT.
Baseline
Barracuda SSL VPN 2.2.2.203 and 2.2.2.115
Swivel 3.9
Architecture
The Barracuda SSL VPN makes authentication requests against the Swivel server by RADIUS.
The client makes TURing requests against the Swivel server using HTTP/HTTPS
Swivel Configuration
Configuring the RADIUS server
On the Swivel Administration console configure the RADIUS Server and NAS, see RADIUS Configuration
Enabling Session creation with username
To allow the TURing image, PINpad and other single channel images, under Server/Single Channel set Allow session request by username to Yes.
Barracuda SSL VPN Configuration
Login to the Barracuda SSL VPN administration console, usually through the ssladmin login.
The user must exist as a user on the Barracuda SSL VPN, the user can be created through the Access Control Tab then select Accounts. Other user data sources may be configurable such as AD.
Create an authentication scheme
From the Access Control tab select Authentication schemes.
Enter a name for Authentication Scheme, such as Swivel RADIUS. From Available Modules select RADIUS then click on Add >>, so it appears on the right as a Selected module., and then select from Available policies the policy required and click Add >>. When complete click Add. A default policy can be used, in this example it is using a custom policy created under Access Control/Policies.
If required move the Swivel RADIUS authentication scheme to the top of the list, the top entry is the default entry presented to the user at login, click More to change the priority.
Barracuda RADIUS Configuration
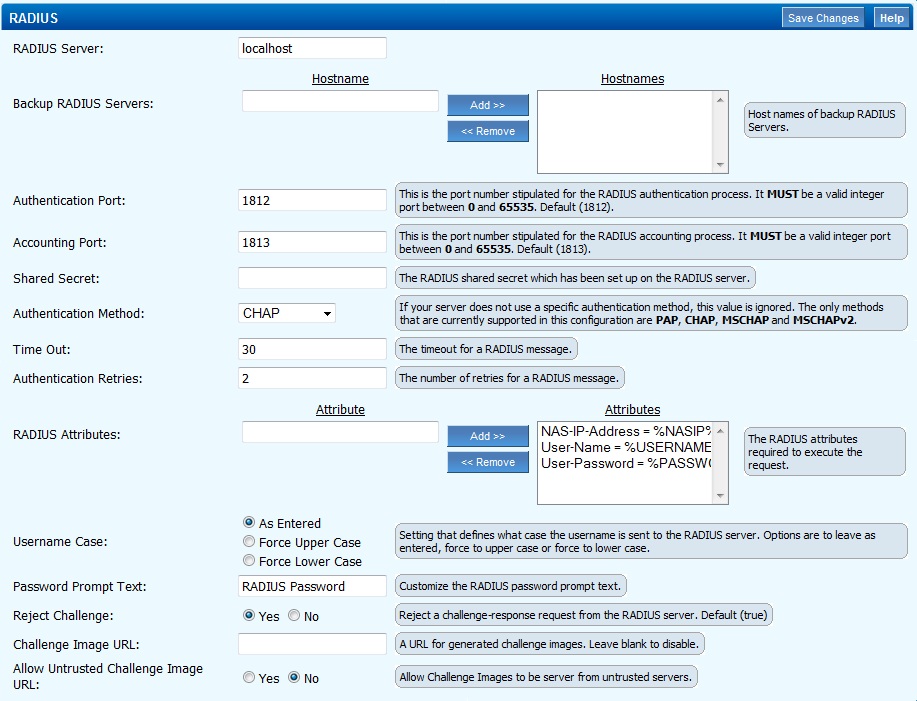
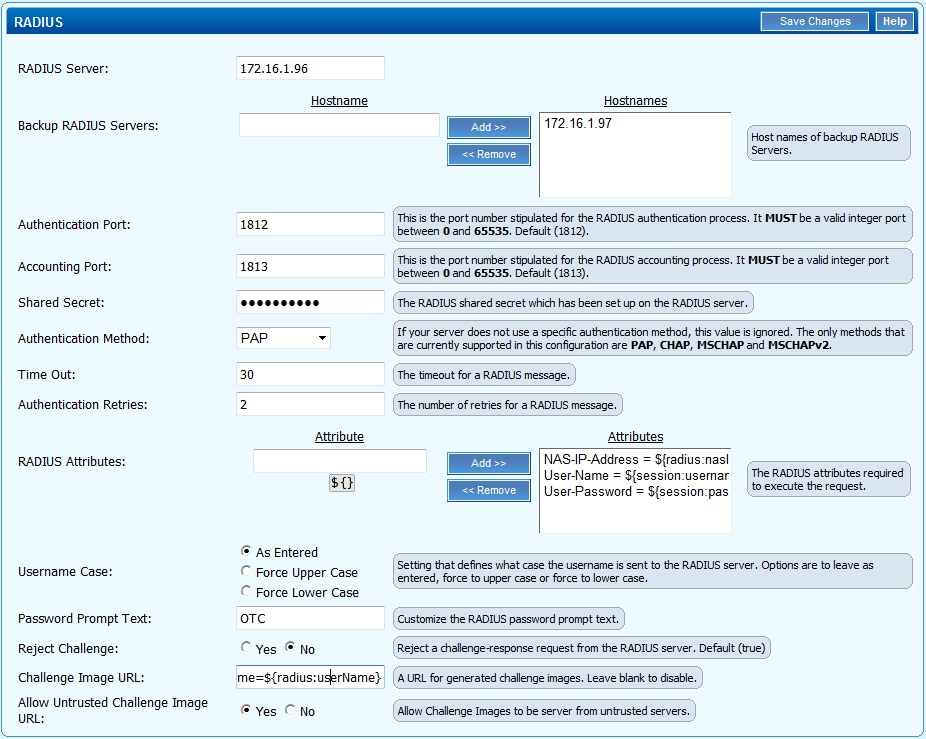
On the SSL VPN administration console select the Access Control tab then select configuration.
Enter the following information:
RADIUS Server: Swivel RADIUS server hostname or IP (Note do not use the Swivel VIP address if this is being used, but the real IP address, see VIP on PINsafe Appliances).
Backup RADIUS Servers: Additional Swivel RADIUS instances as required.
Authentication Port: The Swivel server RADIUS authentication port, default 1812.
Accounting Port: The Swivel server RADIUS accounting port, default 1813.
Shared Secret: The shared secret entered into the NAS entry on the Swivel server.
Authentication Method: Use PAP for Challenge and Response/Two Stage Authentication and mobile clients.
Password Prompt Text: The text to be displayed in the login field, usually set to OTC or One Time Code.
Reject Challenge: Set to No if Two Stage Authentication/Challenge and Response is to be used.
Challenge Image URL: Enter Swivel server details for graphical images to be used for authentication.
See options below for different configuration options.
Allow Untrusted Challenge Image URL: Set to Yes.
Save the RADIUS settings.
Test the RADIUS authentication
At this stage it should be possible to authenticate by SMS, hardware Token, Mobile Phone Client and Taskbar to verify that the RADIUS authentication is working for users. Browse to the SSL VPN login page, and enter Username and if being used, the password. From the Swivel Administration console select User Administration and the required user then View Strings, and select an appropriate authentication string or OTC for the user. At the SSL VPN login enter the required OTC. Check the Swivel logs for a RADIUS success or rejected message. If no RADIUS message is seen, check that the Swivel RADIUS server is started and that the correct ports are being used.
Additional Configuration options
Additional RADIUS configuration Options: Single Channel TURing graphical image
This allows the graphical single channel TURing image to be displayed to the user for authentication. If this is not required, such as if SMS and Mobile Phone Client authentication is to be used, then this step should be skipped and the Challenge Image URL: left blank.
To configure the single channel graphical image set Challenge Image URL: to:
For an Appliance
https://Swivel_server_public_hostname:8443/proxy/SCImage?username=${radius:userName}
For a software only install see Software Only Installation
Allow Untrusted Challenge Image URL: Set to Yes.
Save the RADIUS settings.
Additional RADIUS configuration Options: Multiple String delivery index display
When a user logs in the user can be displayed an image telling them which of their security strings to use for authentication. See also Multiple Security Strings How To Guide
Set Challenge Image URL: to:
For an Appliance
https://Swivel_server_public_hostname:8443/proxy/DCIndexImage?username=${radius:userName}
For a software only install see Software Only Installation
Save the RADIUS settings.
Additional RADIUS configuration Options: Two Stage Authentication
This allows the user to enter a username, then on the second screen a password and then on the third screen will be required to enter their One Time Code. Note that where the graphical TURing image or other image is used, then this will be displayed on the second and third screens even though it is not required on the second screen. See also Two Stage Authentication How to Guide
This requires the Barracuda SSL VPN setting Reject Challenge: to be set to No if Two Stage Authentication/Challenge and Response is to be used, and Authentication Method: should be set to PAP, save the RADIUS settings. On the Swivel administration console the RADIUS/NAS/Two stage authentication needs to be set to Yes, then click Apply. The user also needs to have a repository password, see Password How to Guide.
Testing
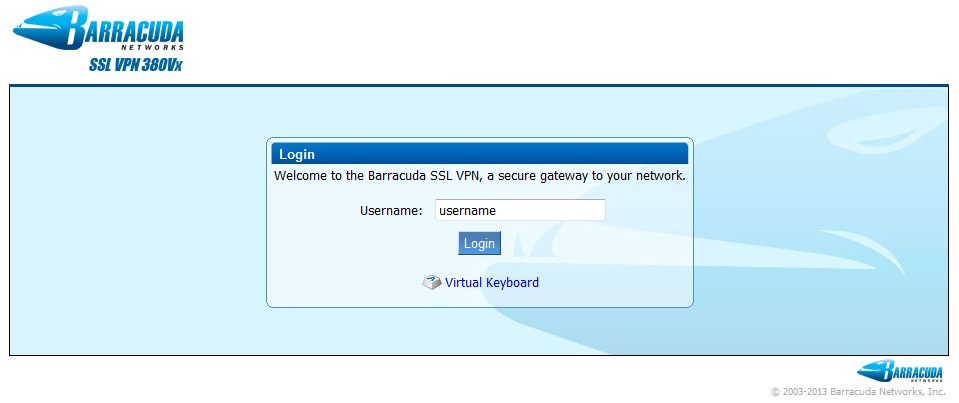
Select the Barracuda SSL VPN login page, enter a username, then select login.
Enter the One Time Code and click login.
Troubleshooting
Check the Swivel logs for Turing images and RADIUS requests.
Known Issues and Limitations
Two Stage authentication will display an image at each stage.
Change PIN is not currently supported to redirect to a Swivel Change PIN page.
Additional Information
For assistance in Swivel installation and configuration please firstly contact your reseller and then email Swivel Secure support at support@swivelsecure.com


